> ## Documentation Index
> Fetch the complete documentation index at: https://dify-6c0370d8-docs-new-agent-experience.mintlify.site/llms.txt
> Use this file to discover all available pages before exploring further.
# Tool Plugin
> Develop a Dify tool plugin from initialization to packaging, using Google Search as a worked example
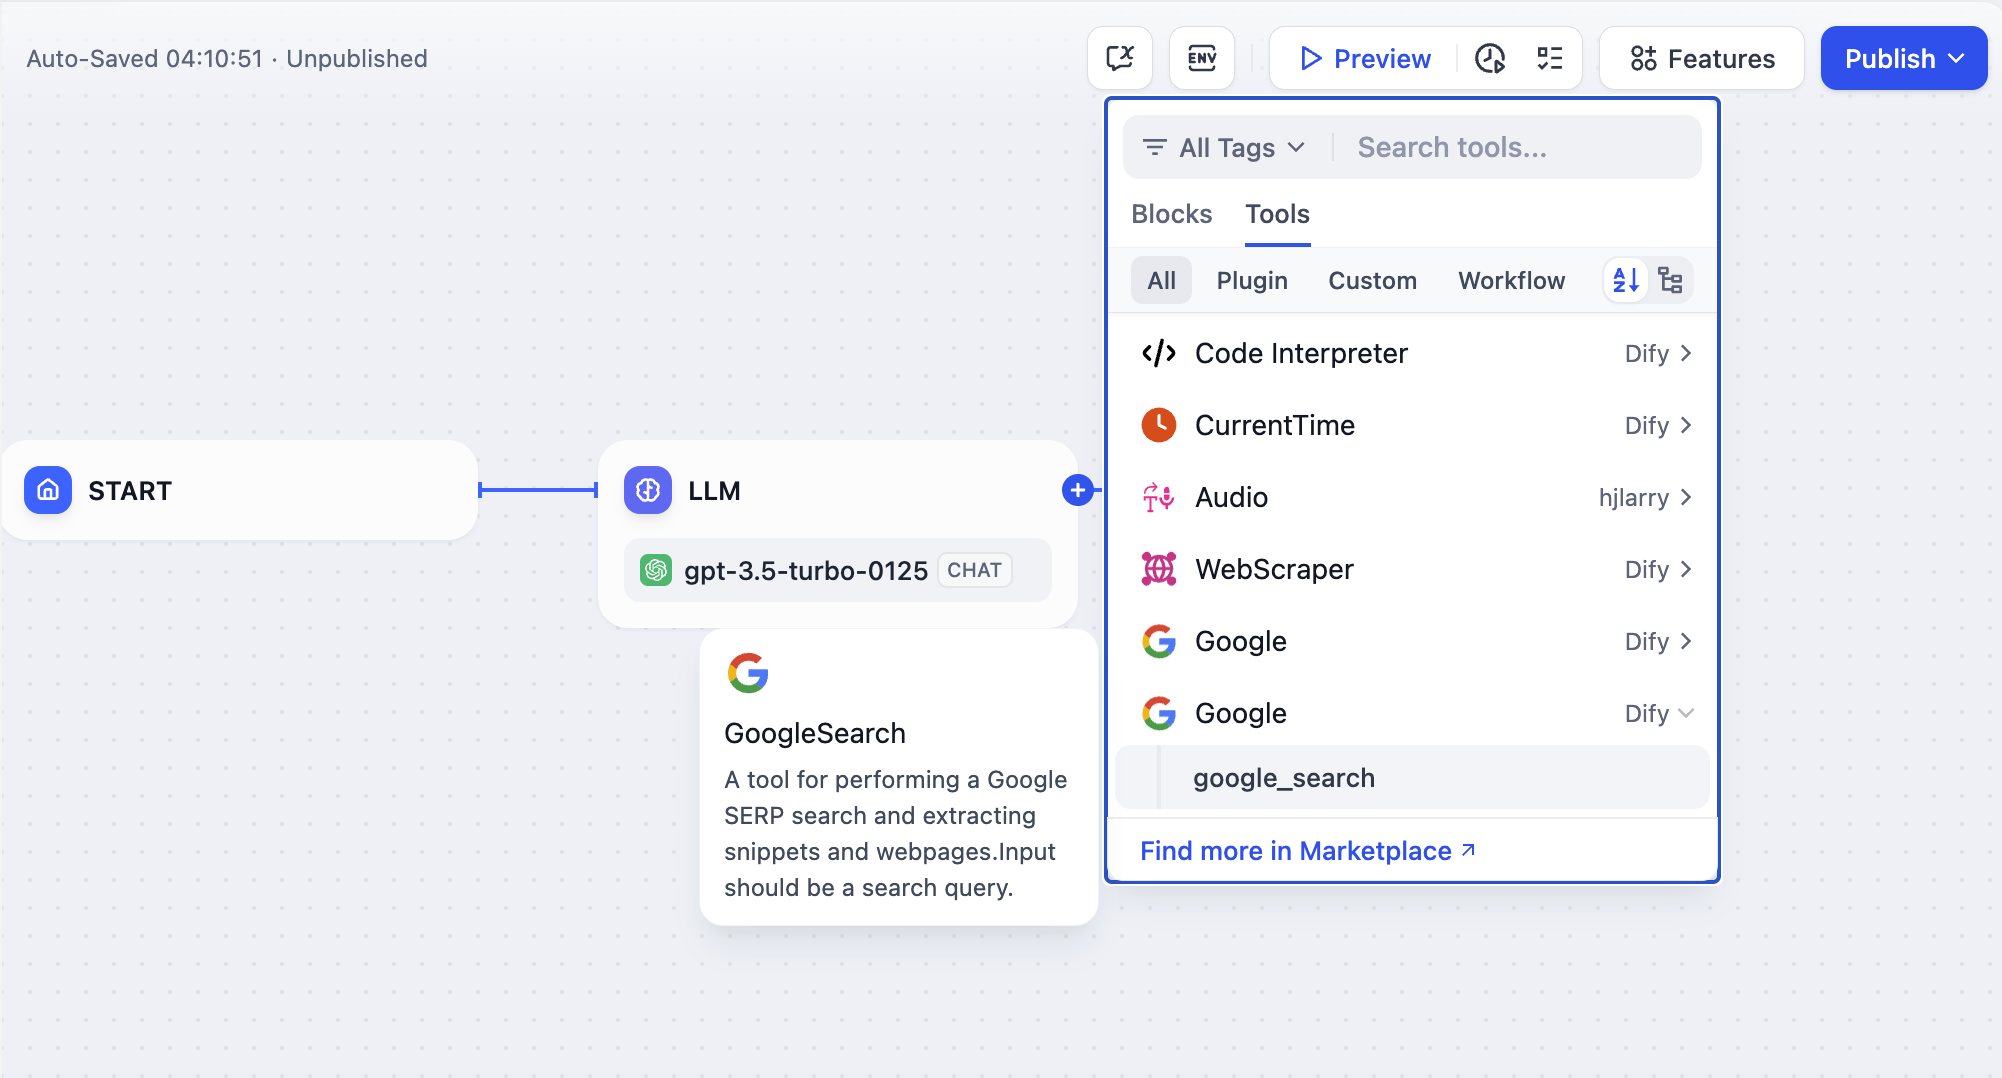
Tools are third-party services that Chatflow, Workflow, and Agent applications can call. They extend Dify applications with capabilities such as online search and image generation.
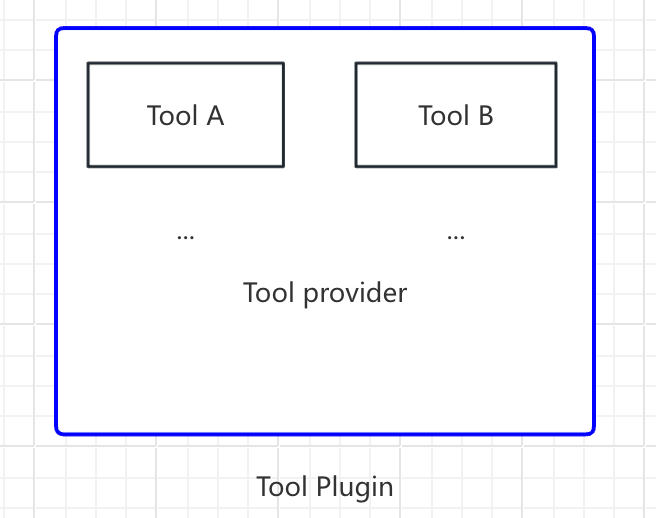
In this guide, a *tool plugin* is a complete project that includes tool provider files, functional code, and supporting structures. A tool provider can bundle multiple tools, each offering a distinct capability:
```text theme={null}
- Tool Provider
- Tool A
- Tool B
```
This guide uses Google Search as an example to walk through tool plugin development.
## Prerequisites
* Dify plugin scaffolding tool
* Python environment (version 3.12)
To set up the scaffolding tool, see [Initializing Development Tools](/en/develop-plugin/getting-started/cli).
## Create a New Project
Run the scaffolding command line tool to create a new Dify plugin project.
```bash theme={null}
./dify-plugin-darwin-arm64 plugin init
```
If you have renamed the binary file to `dify` and copied it to the `/usr/local/bin` path, you can run the following command to create a new plugin project:
```bash theme={null}
dify plugin init
```
The following examples use `dify` as the command. If you run into issues, replace `dify` with the path to your command-line tool.
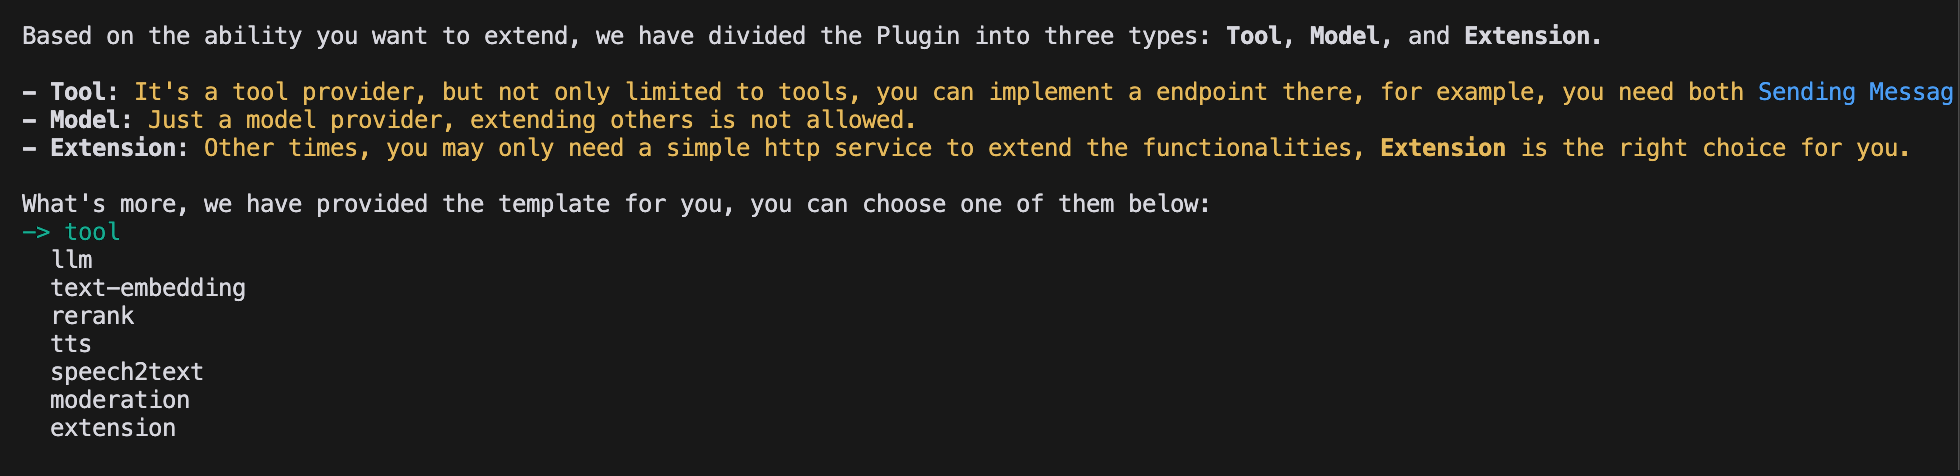
## Choose Plugin Type and Template
Each template in the scaffolding tool is a complete code project. For this example, select the `Tool` plugin.
If you are already familiar with plugin development and don't need a template, see the [General Specifications](/en/develop-plugin/features-and-specs/plugin-types/general-specifications) guide to build any plugin type.
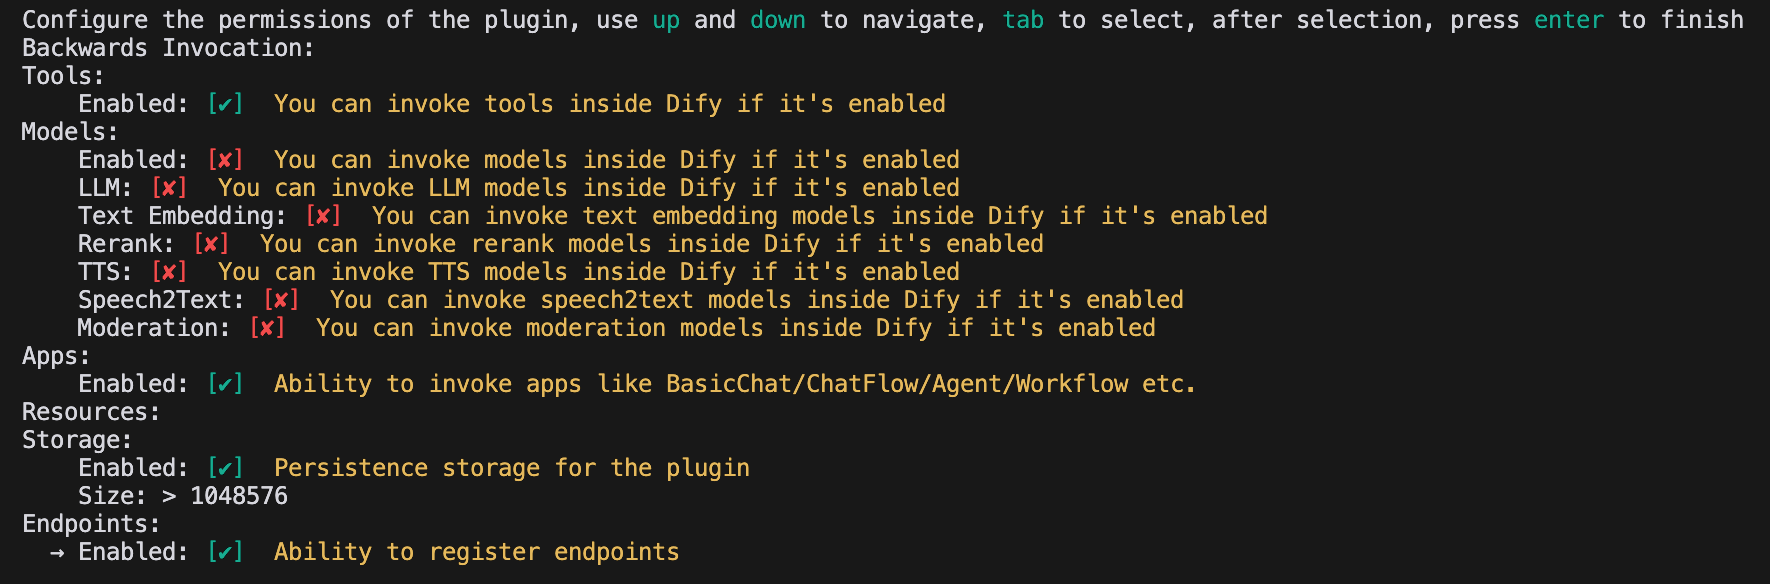
### Configure Plugin Permissions
The plugin also needs permissions to read from the Dify platform. Grant this example plugin the following permissions:
* Tools
* Apps
* Enable persistent storage, with the default storage size
* Allow registering Endpoints
In the terminal, use the arrow keys to select permissions and the Tab key to grant them.
After checking all permission items, press Enter to complete the plugin creation. The system generates the plugin project code automatically.
## Develop the Tool Plugin
### 1. Create the Tool Provider File
The tool provider file is a YAML file that serves as the plugin's base configuration, supplying the authorization information the tool needs.
In the plugin template project, go to the `/provider` directory and rename the YAML file to `google.yaml`. This file describes the tool provider: name, icon, author, and other details shown when the plugin is installed.
Example code:
```yaml theme={null}
identity: # Basic information about the tool provider
author: Your-name # Author
name: google # Unique name; must not duplicate another provider's name
label: # Label shown in the frontend
en_US: Google # English label
zh_Hans: Google # Chinese label
description: # Description shown in the frontend
en_US: Google # English description
zh_Hans: Google # Chinese description
icon: icon.svg # Tool icon; must be placed in the _assets folder
tags: # Tags shown in the frontend
- search
```
Make sure the file path is in the `/tools` directory, with the complete path as follows:
```yaml theme={null}
plugins:
tools:
- 'google.yaml'
```
`google.yaml` must be referenced by its absolute path within the plugin project; in this example, it sits in the project root directory. In the YAML file, `identity` holds the tool provider's basic information: author, name, label, description, and icon.
* The icon must be an attachment resource placed in the `_assets` folder in the project root directory.
* Tags help users find plugins by category. These are all the currently supported tags:
```python theme={null}
class ToolLabelEnum(Enum):
SEARCH = 'search'
IMAGE = 'image'
VIDEOS = 'videos'
WEATHER = 'weather'
FINANCE = 'finance'
DESIGN = 'design'
TRAVEL = 'travel'
SOCIAL = 'social'
NEWS = 'news'
MEDICAL = 'medical'
PRODUCTIVITY = 'productivity'
EDUCATION = 'education'
BUSINESS = 'business'
ENTERTAINMENT = 'entertainment'
UTILITIES = 'utilities'
OTHER = 'other'
```
### 2. Add Third-Party Service Credentials
For convenience, this example uses the Google Search API provided by the third-party service SerpApi. SerpApi requires an API key, so add a `credentials_for_provider` field to the YAML file.
The complete code:
```yaml theme={null}
identity:
author: Dify
name: google
label:
en_US: Google
zh_Hans: Google
pt_BR: Google
description:
en_US: Google
zh_Hans: GoogleSearch
pt_BR: Google
icon: icon.svg
tags:
- search
credentials_for_provider: # Add the credentials_for_provider field
serpapi_api_key:
type: secret-input
required: true
label:
en_US: SerpApi API key
zh_Hans: SerpApi API key
placeholder:
en_US: Please input your SerpApi API key
zh_Hans: Please enter your SerpApi API key
help:
en_US: Get your SerpApi API key from SerpApi
zh_Hans: Get your SerpApi API key from SerpApi
url: https://serpapi.com/manage-api-key
tools:
- tools/google_search.yaml
extra:
python:
source: google.py
```
* The sub-level structure of `credentials_for_provider` must meet the requirements in [General Specifications](/en/develop-plugin/features-and-specs/plugin-types/general-specifications).
* Specify which tools the provider includes. This example includes only one file, `tools/google_search.yaml`.
* Besides its basic information, a provider needs code logic, so specify its implementation file. This example uses `google.py`, but leave it unimplemented for now and write the `google_search` tool code first.
### 3. Fill in the Tool YAML File
A tool plugin can contain multiple tools, each described by its own YAML file covering basic information, parameters, and output.
Continuing with the `GoogleSearch` tool, create a new `google_search.yaml` file in the `/tools` folder.
```yaml theme={null}
identity:
name: google_search
author: Dify
label:
en_US: GoogleSearch
zh_Hans: Google Search
pt_BR: GoogleSearch
description:
human:
en_US: A tool for performing a Google SERP search and extracting snippets and webpages. Input should be a search query.
zh_Hans: A tool for performing a Google SERP search and extracting snippets and webpages. Input should be a search query.
pt_BR: A tool for performing a Google SERP search and extracting snippets and webpages. Input should be a search query.
llm: A tool for performing a Google SERP search and extracting snippets and webpages. Input should be a search query.
parameters:
- name: query
type: string
required: true
label:
en_US: Query string
zh_Hans: Query string
pt_BR: Query string
human_description:
en_US: used for searching
zh_Hans: used for searching web content
pt_BR: used for searching
llm_description: key words for searching
form: llm
extra:
python:
source: tools/google_search.py
```
* **`identity`**: Basic information about the tool, including name, author, label, and description.
* **`parameters`**: The parameter list.
* **`name`** (required): Parameter name; must be unique among the tool's parameters.
* **`type`** (required): Parameter type. One of `string`, `number`, `boolean`, `select`, or `secret-input`, rendered as a string, number, boolean, dropdown, or encrypted input box. Use `secret-input` for sensitive information.
* **`label`** (required): Parameter label, shown in the frontend.
* **`form`** (required): Form type, either `llm` or `form`.
* In Agent applications, `llm` means the LLM infers the parameter itself, while `form` means the parameter can be preset before using the tool.
* In Workflow applications, both `llm` and `form` parameters are filled in via the frontend, but `llm` parameters are used as input variables for the tool node.
* **`required`** (optional): Whether the parameter is required.
* In `llm` mode, a required parameter must be inferred by the Agent.
* In `form` mode, a required parameter must be filled in on the frontend before the conversation begins.
* **`options`** (optional): Parameter options.
* In `llm` mode, Dify passes all options to the LLM, which can infer based on them.
* In `form` mode, the frontend displays the options when `type` is `select`.
* **`default`** (optional): Default value.
* **`min`** (optional): Minimum value; applies when the parameter type is `number`.
* **`max`** (optional): Maximum value; applies when the parameter type is `number`.
* **`human_description`** (optional): Description shown in the frontend; supports multiple languages.
* **`placeholder`** (optional): Hint text for the input field; applies when the form type is `form` and the parameter type is `string`, `number`, or `secret-input`. Supports multiple languages.
* **`llm_description`** (optional): Description passed to the LLM. Write it in as much detail as possible so the LLM understands the parameter.
### 4. Write the Tool Code
With the tool configuration in place, write the code that implements the tool's logic. Create `google_search.py` in the `/tools` directory with the following content:
```python theme={null}
from collections.abc import Generator
from typing import Any
import requests
from dify_plugin import Tool
from dify_plugin.entities.tool import ToolInvokeMessage
SERP_API_URL = "https://serpapi.com/search"
class GoogleSearchTool(Tool):
def _parse_response(self, response: dict) -> dict:
result = {}
if "knowledge_graph" in response:
result["title"] = response["knowledge_graph"].get("title", "")
result["description"] = response["knowledge_graph"].get("description", "")
if "organic_results" in response:
result["organic_results"] = [
{
"title": item.get("title", ""),
"link": item.get("link", ""),
"snippet": item.get("snippet", ""),
}
for item in response["organic_results"]
]
return result
def _invoke(self, tool_parameters: dict[str, Any]) -> Generator[ToolInvokeMessage]:
params = {
"api_key": self.runtime.credentials["serpapi_api_key"],
"q": tool_parameters["query"],
"engine": "google",
"google_domain": "google.com",
"gl": "us",
"hl": "en",
}
response = requests.get(url=SERP_API_URL, params=params, timeout=5)
response.raise_for_status()
valuable_res = self._parse_response(response.json())
yield self.create_json_message(valuable_res)
```
This code sends a request to `serpapi` and uses `self.create_json_message` to return formatted JSON data. To learn more about return data types, see [Remote Debugging Plugins](/en/develop-plugin/features-and-specs/plugin-types/remote-debug-a-plugin) and [Persistent Storage KV](/en/develop-plugin/features-and-specs/plugin-types/persistent-storage-kv).
### 5. Complete the Tool Provider Code
Finally, implement the provider's credential validation logic. If validation fails, the code raises a `ToolProviderCredentialValidationError` exception; once validation succeeds, the `google_search` tool service is requested correctly.
Create a `google.py` file in the `/provider` directory with the following content:
```python theme={null}
from typing import Any
from dify_plugin import ToolProvider
from dify_plugin.errors.tool import ToolProviderCredentialValidationError
from tools.google_search import GoogleSearchTool
class GoogleProvider(ToolProvider):
def _validate_credentials(self, credentials: dict[str, Any]) -> None:
try:
for _ in GoogleSearchTool.from_credentials(credentials).invoke(
tool_parameters={"query": "test", "result_type": "link"},
):
pass
except Exception as e:
raise ToolProviderCredentialValidationError(str(e))
```
## Debug the Plugin
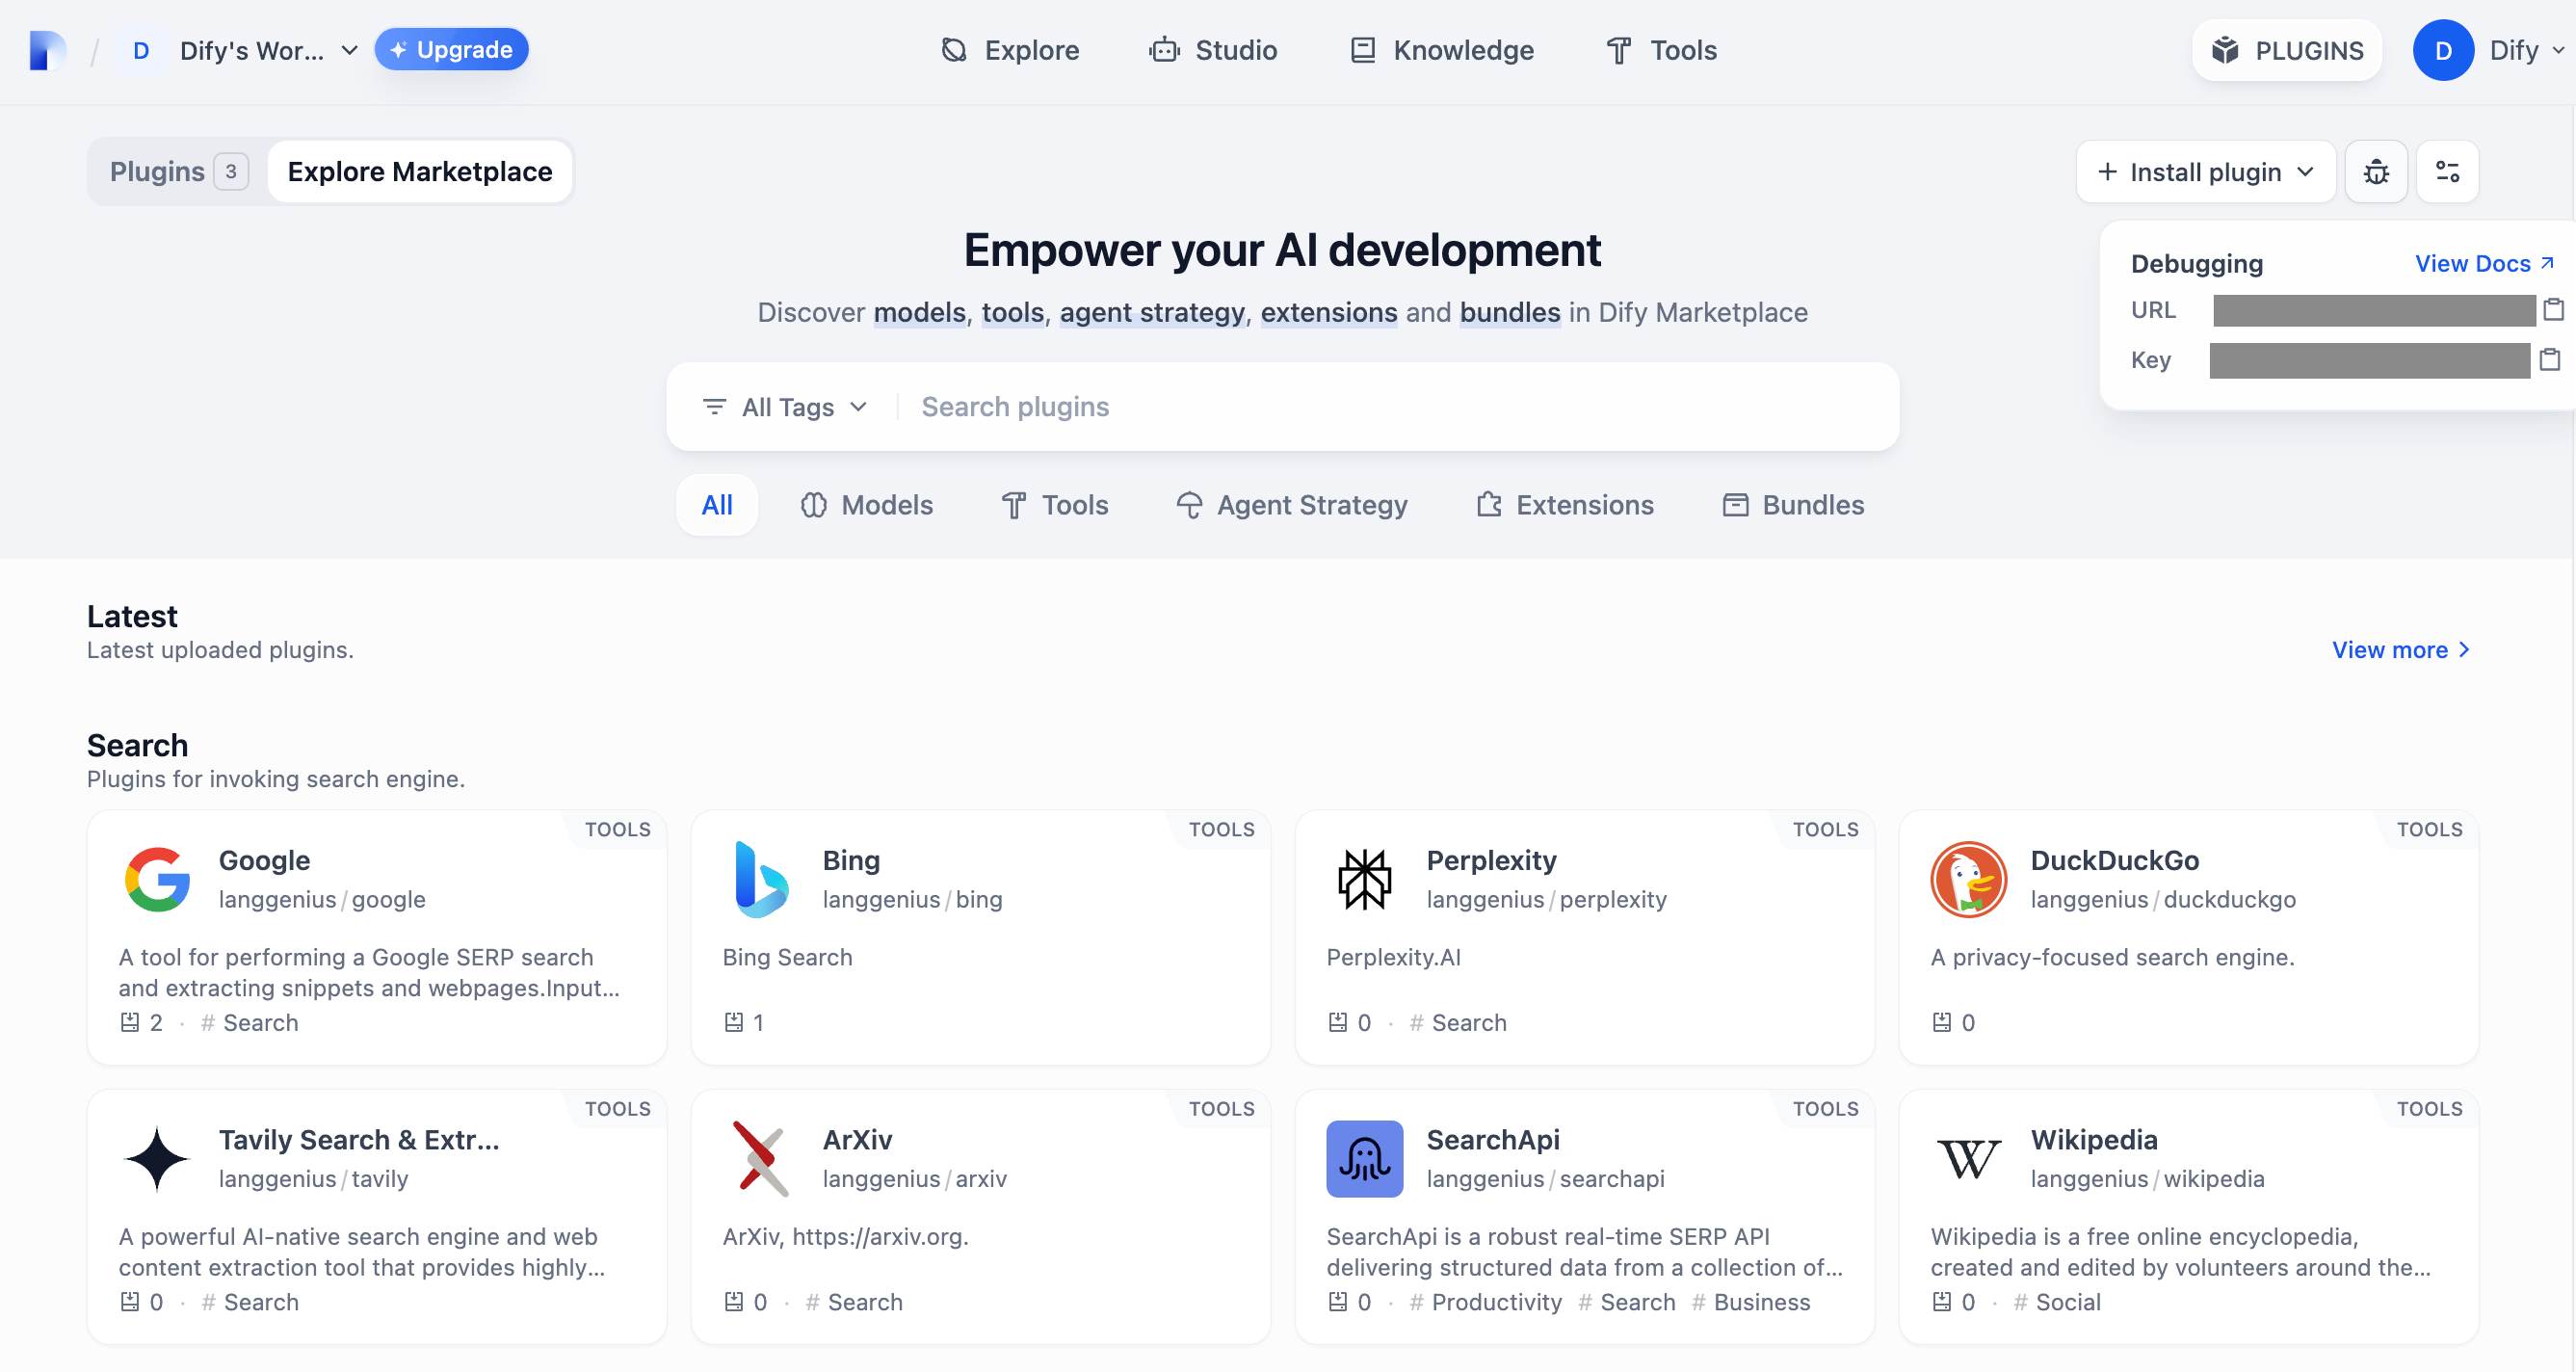
After development, test whether the plugin works correctly. Dify provides remote debugging so you can quickly verify the plugin's functionality in a test environment.
Go to the [Plugin Management](https://cloud.dify.ai/plugins) page to get the remote server address and debug key.
Back in the plugin project, copy the `.env.example` file, rename it to `.env`, and fill in the remote server address and debug key.
`.env` file:
```bash theme={null}
INSTALL_METHOD=remote
REMOTE_INSTALL_URL=debug.dify.ai:5003
REMOTE_INSTALL_KEY=********-****-****-****-************
```
Run `python -m main` to start the plugin. On the **Plugins** page, you can see the plugin installed in the workspace, where other team members can also access it.

## Package the Plugin (Optional)
Once the plugin runs correctly, package and name it with the following command. It produces a `google.difypkg` file in the current folder—the final plugin package.
```bash theme={null}
# Replace ./google with the actual path of the plugin project
dify plugin package ./google
```
Congratulations—you've developed, debugged, and packaged a tool plugin!
## Publish the Plugin (Optional)
To publish the plugin to the Dify Marketplace, make sure it follows the specifications in [Publish to Dify Marketplace](/en/develop-plugin/publishing/marketplace-listing/release-to-dify-marketplace). After the review passes, the code is merged into the main branch and automatically released on the [Dify Marketplace](https://marketplace.dify.ai/).
For the full process, see the [Publishing Overview](/en/develop-plugin/publishing/marketplace-listing/release-overview).
## Explore More
### Quick Start
* [Developing Extension Plugins](/en/develop-plugin/dev-guides-and-walkthroughs/endpoint)
* [Developing Model Plugins](/en/develop-plugin/dev-guides-and-walkthroughs/creating-new-model-provider)
* [Bundle Plugins: Packaging Multiple Plugins](/en/develop-plugin/features-and-specs/advanced-development/bundle)
### Plugin Interface Documentation
* [General Specifications](/en/develop-plugin/features-and-specs/plugin-types/general-specifications): Manifest structure and tool specifications.
* [Endpoint](/en/develop-plugin/dev-guides-and-walkthroughs/endpoint): Detailed Endpoint definition.
* [Reverse Invocation](/en/develop-plugin/features-and-specs/advanced-development/reverse-invocation): Reverse invocation of Dify capabilities.
* [Model Schema](/en/develop-plugin/features-and-specs/plugin-types/model-schema): Models.
* [Agent Plugins](/en/develop-plugin/features-and-specs/advanced-development/reverse-invocation): Extending Agent strategies.
## Next Steps
* [Remote Debugging Plugins](/en/develop-plugin/features-and-specs/plugin-types/remote-debug-a-plugin): Learn more advanced debugging techniques.
* [Persistent Storage](/en/develop-plugin/features-and-specs/plugin-types/persistent-storage-kv): Use data storage in plugins.
* [Slack Bot Plugin Development Example](/en/develop-plugin/dev-guides-and-walkthroughs/develop-a-slack-bot-plugin): A more complex plugin development case.
* [Tool Plugin](/en/develop-plugin/features-and-specs/plugin-types/tool): Advanced features of tool plugins.