> ## Documentation Index
> Fetch the complete documentation index at: https://dify-6c0370d8-docs-new-agent-experience.mintlify.site/llms.txt
> Use this file to discover all available pages before exploring further.
# Agent
> Run an agent as a step in your workflow, reasoning and using tools to complete a task
The new Agent node is in beta. To use it, turn on [`ENABLE_AGENT_V2`](/en/self-host/deploy/configuration/environments#enable_agent_v2) and run the sandbox container.
The classic Agent node gives your LLM autonomous control over tools, enabling it to iteratively decide which tools to use and when to use them. Instead of pre-planning every step, the Agent reasons through problems dynamically, calling tools as needed to complete complex tasks.
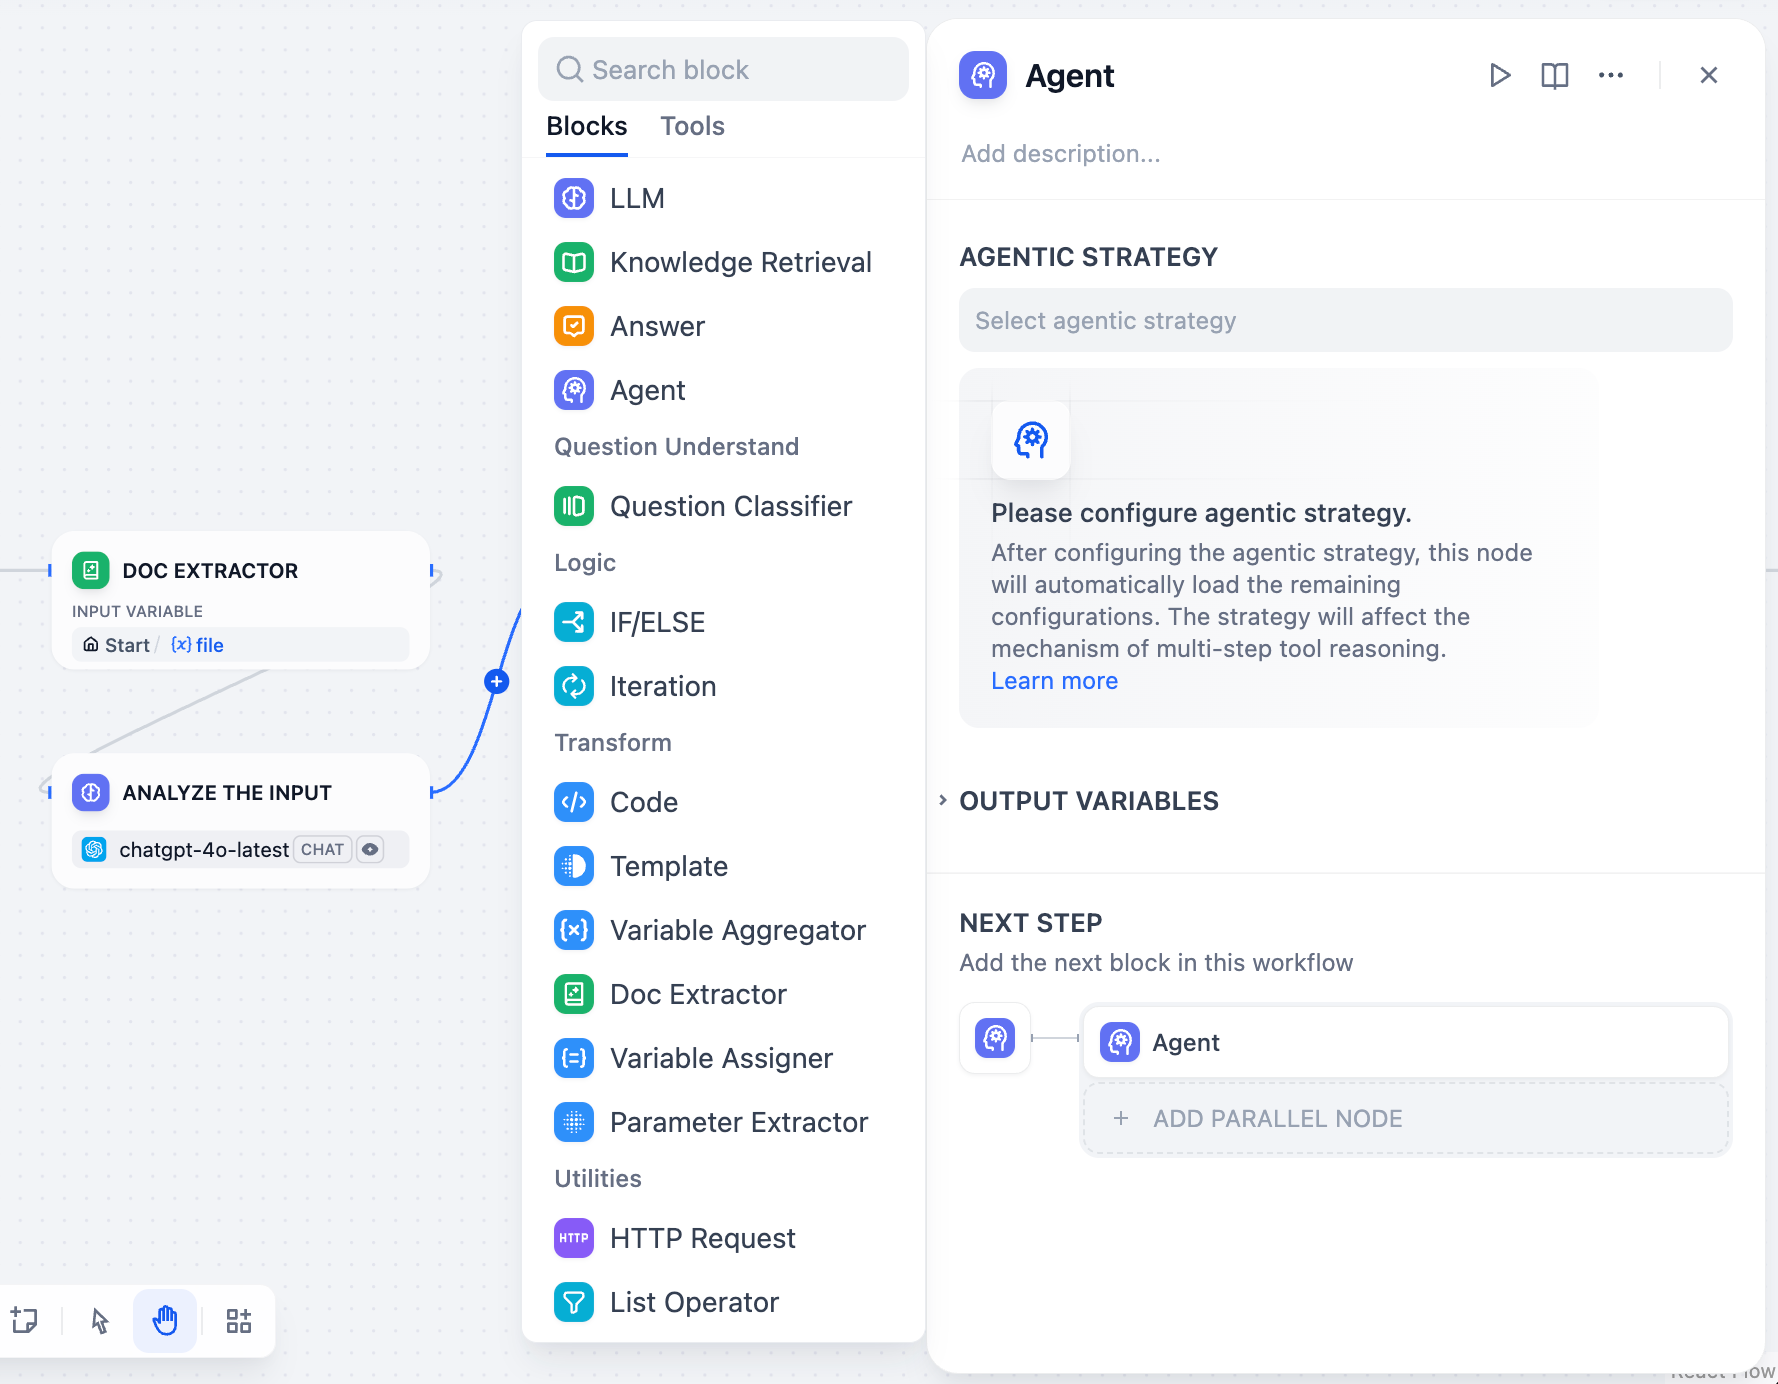
## Agent Strategies
Agent strategies define how your Agent thinks and acts. Choose the approach that best matches your model's capabilities and task requirements.
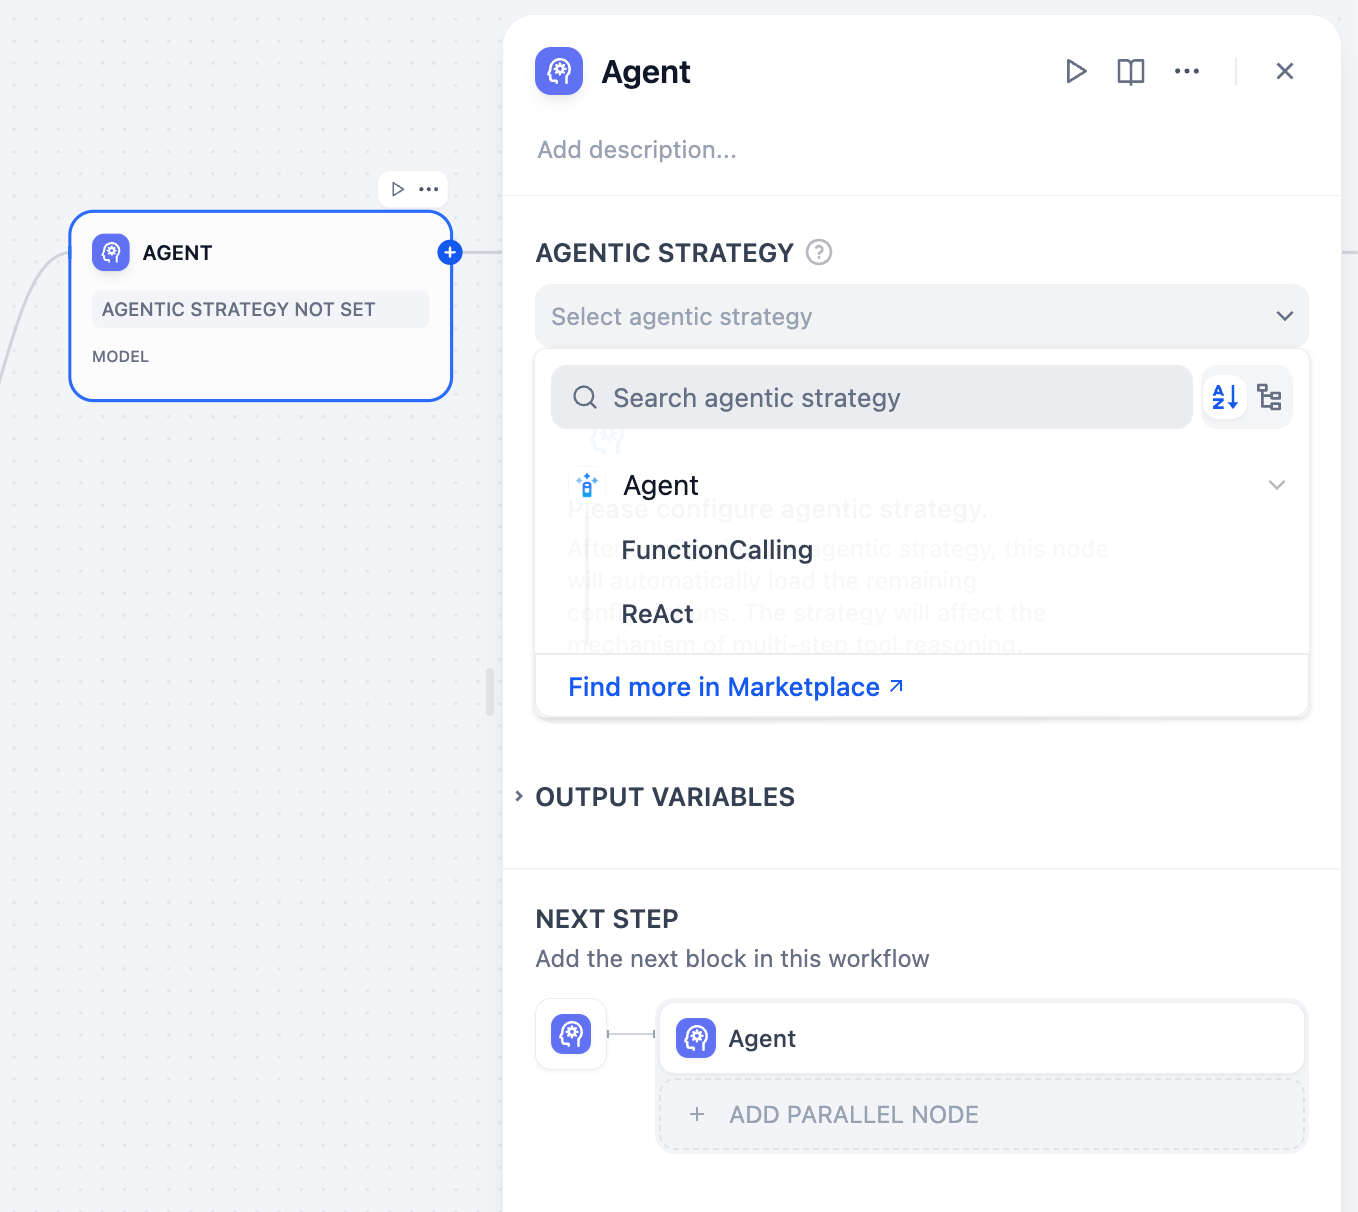
Uses the LLM's native function calling capabilities to directly pass tool definitions through the tools parameter. The LLM decides when and how to call tools using its built-in mechanism.
Best for models like GPT-4, Claude 3.5, and other models with robust function calling support.
Uses structured prompts that guide the LLM through explicit reasoning steps. Follows a **Thought → Action → Observation** cycle for transparent decision-making.
Works well with models that may not have native function calling or when you need explicit reasoning traces.
Install additional strategies from **Marketplace → Agent Strategies** or contribute custom strategies to the [community repository](https://github.com/langgenius/dify-plugins).
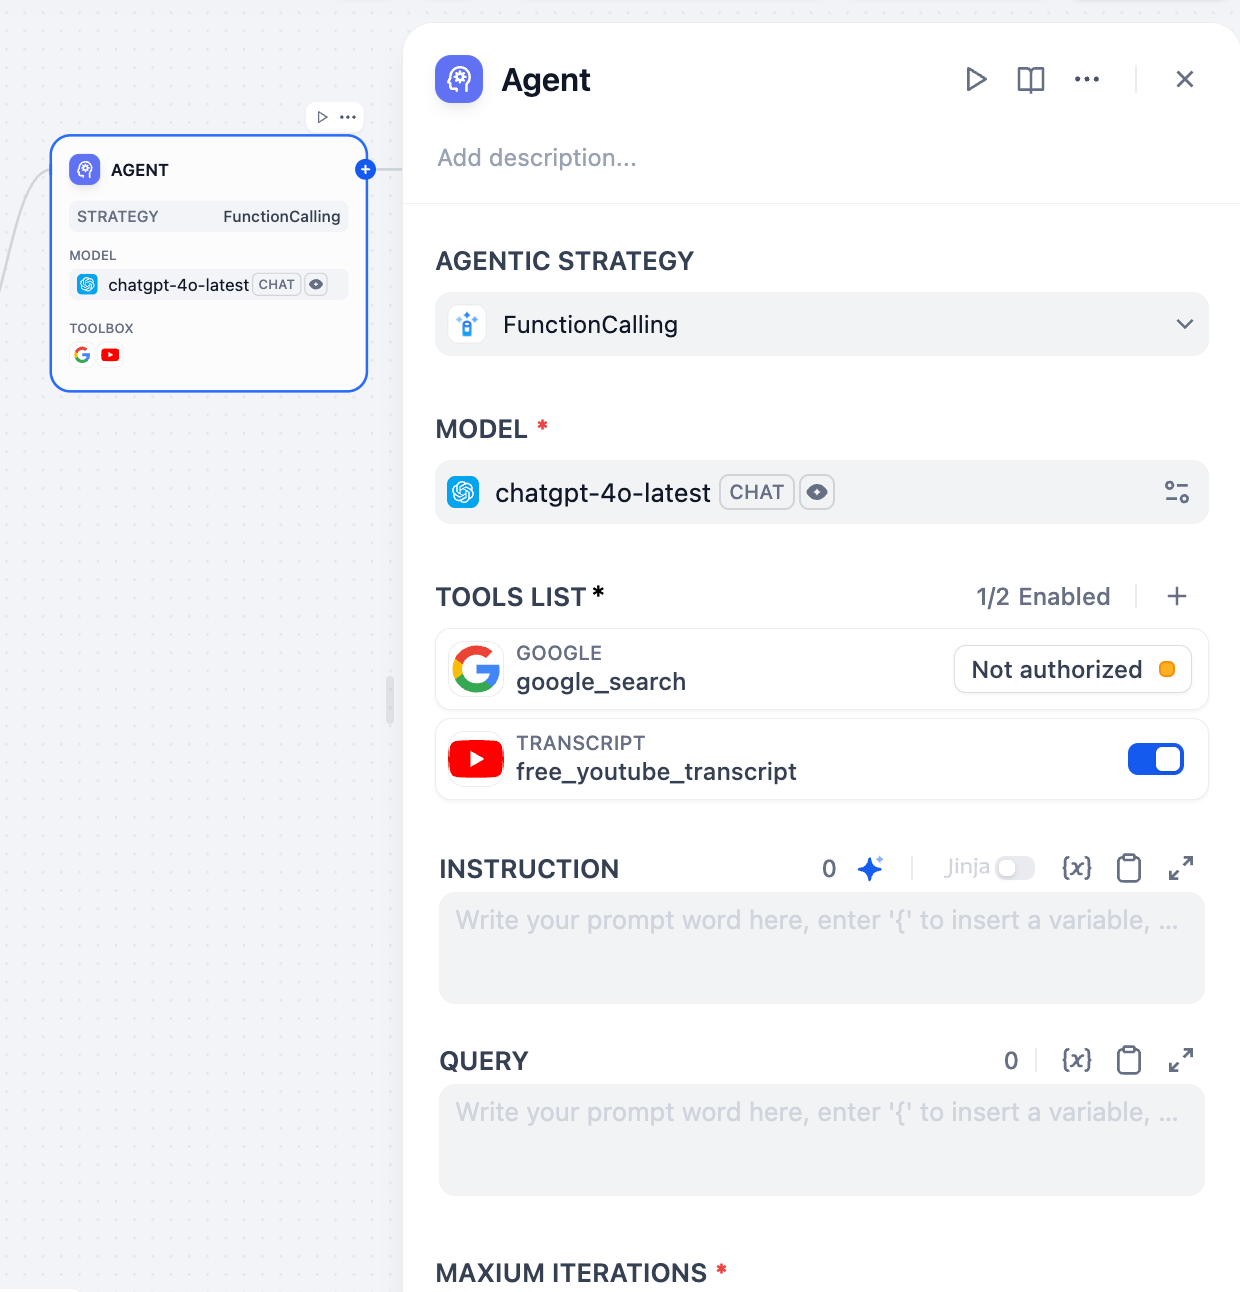
## Configuration
### Model Selection
Choose an LLM that supports your selected agent strategy. More capable models handle complex reasoning better but cost more per iteration. Ensure your model supports function calling if using that strategy.
### Tool Configuration
Configure the tools your Agent can access. Each tool requires:
**Authorization** - API keys and credentials for external services configured in your workspace
**Description** - Clear explanation of what the tool does and when to use it (this guides the Agent's decision-making)
**Parameters** - Required and optional inputs the tool accepts with proper validation
### Instructions and Context
Define the Agent's role, goals, and context using natural language instructions. Use Jinja2 syntax to reference variables from upstream workflow nodes.
**Query** specifies the user input or task the Agent should work on. This can be dynamic content from previous workflow nodes.
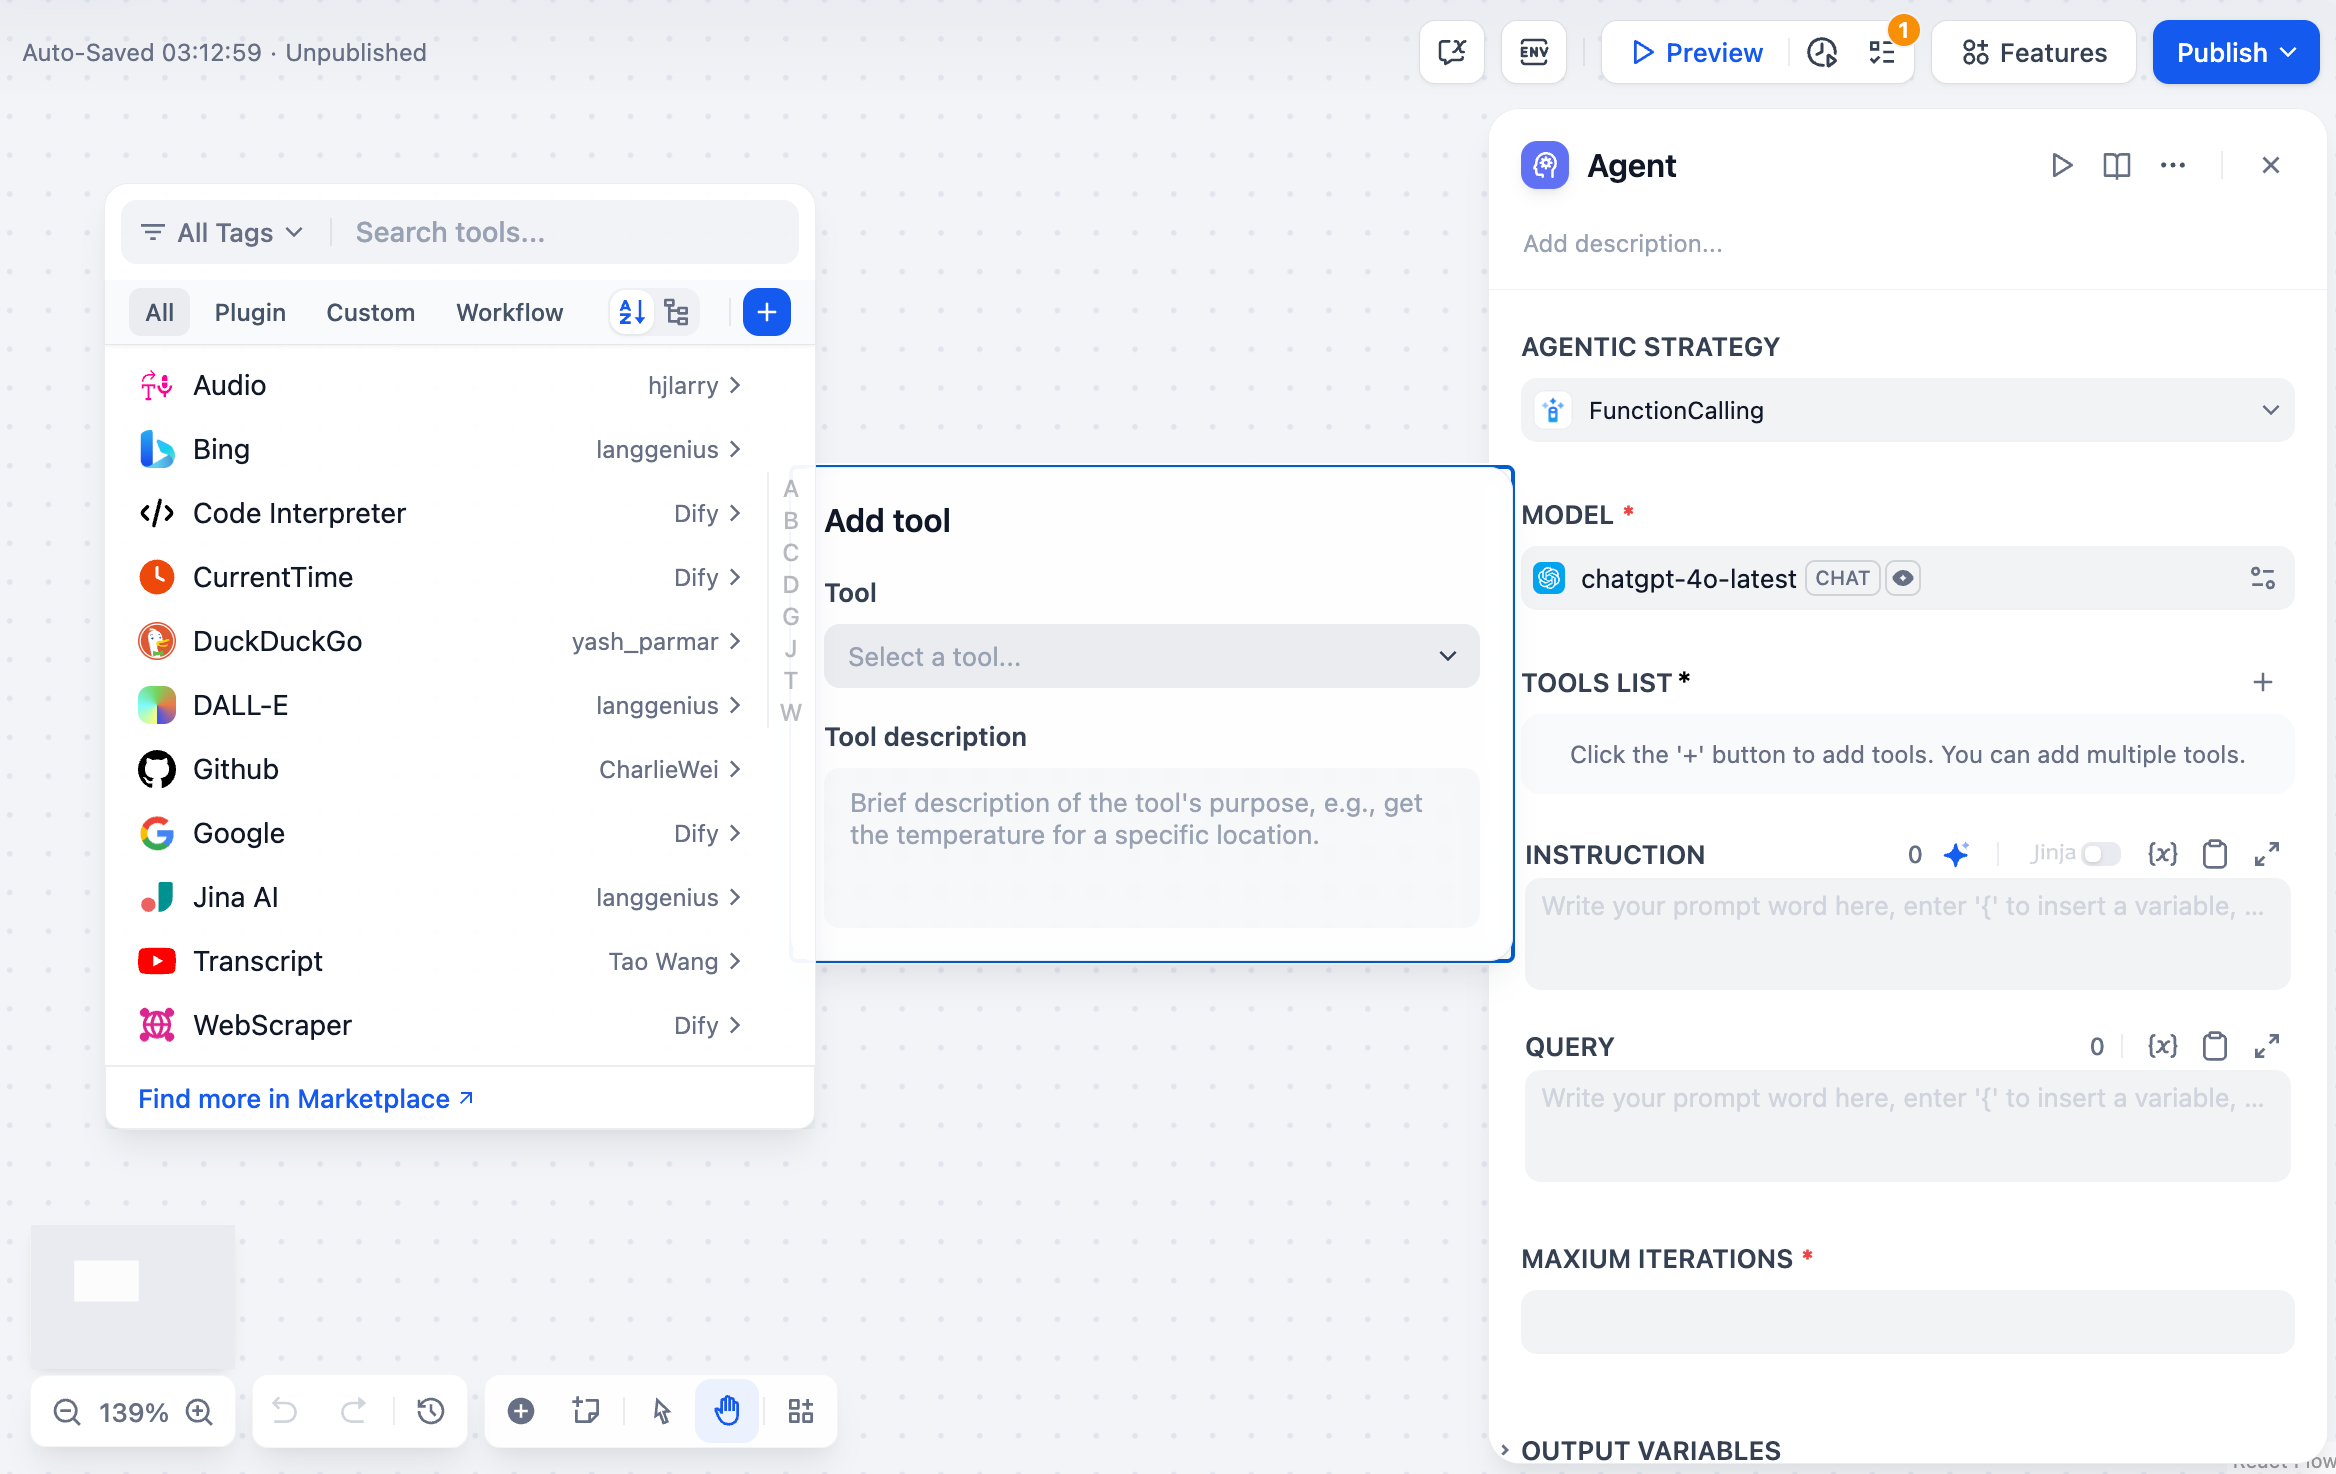
### Execution Controls
**Maximum Iterations** sets a safety limit to prevent infinite loops. Configure based on task complexity - simple tasks need 3-5 iterations, while complex research might require 10-15.
**Memory** controls how many previous messages the Agent remembers using TokenBufferMemory. Larger memory windows provide more context but increase token costs. This enables conversational continuity where users can reference previous actions.
### Tool Parameter Auto-Generation
Tools can have parameters configured as **auto-generated** or **manual input**. Auto-generated parameters (`auto: false`) are automatically populated by the Agent, while manual input parameters require explicit values that become part of the tool's permanent configuration.
## Output Variables
Agent nodes provide comprehensive output including:
**Final Answer** - The Agent's ultimate response to the query
**Tool Outputs** - Results from each tool invocation during execution
**Reasoning Trace** - Step-by-step decision process (especially detailed with ReAct strategy) available in the JSON output
**Iteration Count** - Number of reasoning cycles used
**Success Status** - Whether the Agent completed the task successfully
**Agent Logs** - Structured log events with metadata for debugging and monitoring tool invocations
## Use Cases
**Research and Analysis** - Agents can autonomously search multiple sources, synthesize information, and provide comprehensive answers.
**Troubleshooting** - Diagnostic tasks where the Agent needs to gather information, test hypotheses, and adapt its approach based on findings.
**Multi-step Data Processing** - Complex workflows where the next action depends on intermediate results.
**Dynamic API Integration** - Scenarios where the sequence of API calls depends on responses and conditions that can't be predetermined.
## Best Practices
**Clear Tool Descriptions** help the Agent understand when and how to use each tool effectively.
**Appropriate Iteration Limits** prevent runaway costs while allowing sufficient flexibility for complex tasks.
**Detailed Instructions** provide context about the Agent's role, goals, and any constraints or preferences.
**Memory Management** balance context retention with token efficiency based on your use case requirements.
**Data Security Notice**
When exposing the same agent to multiple end users in Community Edition, Dify applies precautionary safeguards intended to reduce cross-conversation data access risks. However, CE relies on soft isolation rather than hard per-user or per-run filesystem isolation, and runs may share the same underlying container or base filesystem.
As a result, malicious prompts, tool execution, or similar attacks may still access data outside the intended working directory. For strict security or compliance requirements, use Dify Cloud or Enterprise, or deploy with separate hardened infrastructure isolation.
The new Agent node runs an [agent](/en/self-host/use-dify/build/new-agent/overview) as one step of a workflow.
You pick the agent and tell it what to do; it reasons through the task on its own with its model, tools, knowledge, and skills, then hands the results back to the rest of the flow.
## Choose an Agent
When you add the node, pick who does the work:
You can invite any published agent: it arrives with its saved capabilities, and you set only its task here.
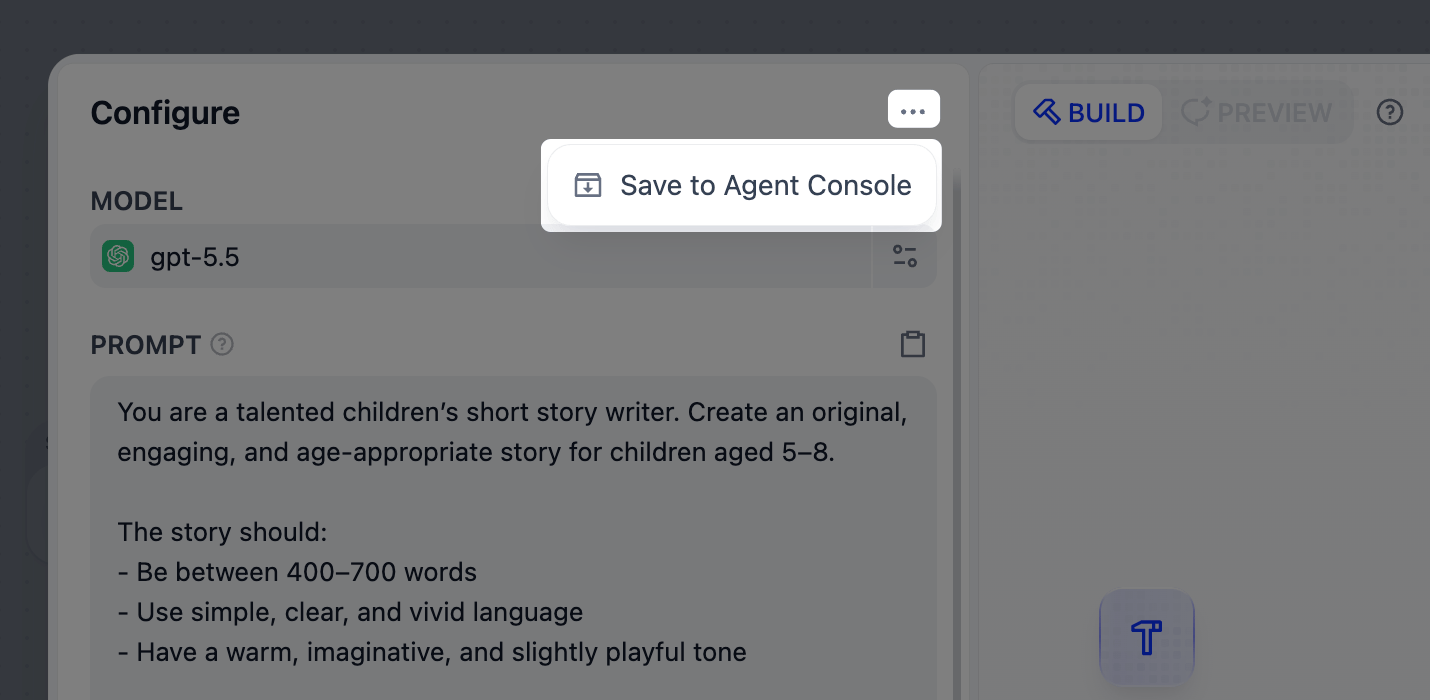
An invited agent is like a full-time employee: its capabilities are managed centrally in **Roster**. When you publish an update there, every workflow that uses the agent gets it.
* To edit its capabilities, click **Edit in Agent Console**.
* If you want changes for this step only, click **Make a copy**: the node switches to a one-time copy that no longer follows the original.
Create a one-time agent that lives on this node alone, and configure it right here, the same way you build one in **Roster**.
It's like a temp you bring in for one job. If it proves its worth, promote it into **Roster** to reuse it elsewhere.
 You can always swap the agent later.
## Give It a Task
In **Agent task**, describe what you need at this step, the way you'd brief a colleague on one job. This is separate from the agent's own prompt and capabilities. Type `/` to pull in outputs from earlier nodes.
Say you've invited a support agent that already knows your product docs and writes in your support tone, and the workflow hands it inbound customer emails. The task covers only this step:
```text wrap theme={null}
Read the customer email in {{customer_email}} and draft a reply that answers every question in it. Keep it under 150 words.
```
## Declare Its Outputs
Every Agent node returns `text`, `files`, and `json` by default: everything the agent writes and produces arrives through them.
Often a later step needs one specific piece of that, like a single value or a particular file. Declare it as its own output: type `/` in the **Agent task**, choose **New output**, then name it and pick a type in place. Each declared output can be referenced by downstream nodes on its own.
A declared output sits right in the task text, so you can tell the agent exactly what to put in it. For example, in this task `{{vendor_name}}` and `{{quote_file}}` are declared outputs:
```text wrap theme={null}
Compare the three vendor quotes in {{vendor_quotes}} and write a recommendation. Put the winning vendor's name in {{vendor_name}} and its quote PDF in {{quote_file}}.
```
You can always swap the agent later.
## Give It a Task
In **Agent task**, describe what you need at this step, the way you'd brief a colleague on one job. This is separate from the agent's own prompt and capabilities. Type `/` to pull in outputs from earlier nodes.
Say you've invited a support agent that already knows your product docs and writes in your support tone, and the workflow hands it inbound customer emails. The task covers only this step:
```text wrap theme={null}
Read the customer email in {{customer_email}} and draft a reply that answers every question in it. Keep it under 150 words.
```
## Declare Its Outputs
Every Agent node returns `text`, `files`, and `json` by default: everything the agent writes and produces arrives through them.
Often a later step needs one specific piece of that, like a single value or a particular file. Declare it as its own output: type `/` in the **Agent task**, choose **New output**, then name it and pick a type in place. Each declared output can be referenced by downstream nodes on its own.
A declared output sits right in the task text, so you can tell the agent exactly what to put in it. For example, in this task `{{vendor_name}}` and `{{quote_file}}` are declared outputs:
```text wrap theme={null}
Compare the three vendor quotes in {{vendor_quotes}} and write a recommendation. Put the winning vendor's name in {{vendor_name}} and its quote PDF in {{quote_file}}.
```