> ## Documentation Index
> Fetch the complete documentation index at: https://dify-6c0370d8-docs-new-agent-experience.mintlify.site/llms.txt
> Use this file to discover all available pages before exploring further.
# レッスン 7:ワークフローを強化する(ツール)
> このドキュメントは AI によって自動翻訳されています。不正確な部分がある場合は、[英語版](/en/learn/tutorials/workflow-101/lesson-07) を参照してください。
メールアシスタントはナレッジベースを活用できるようになりました。しかし、ナレッジベースの範囲を超えた質問が来たらどうでしょうか?例えば、「Dify の最新リリースには何が含まれていますか?」のような質問です。
ナレッジベースがまだ更新されていない場合、ワークフローは対応できません。これを解決するために、ライブ検索スキルを装備しましょう!
## ツール
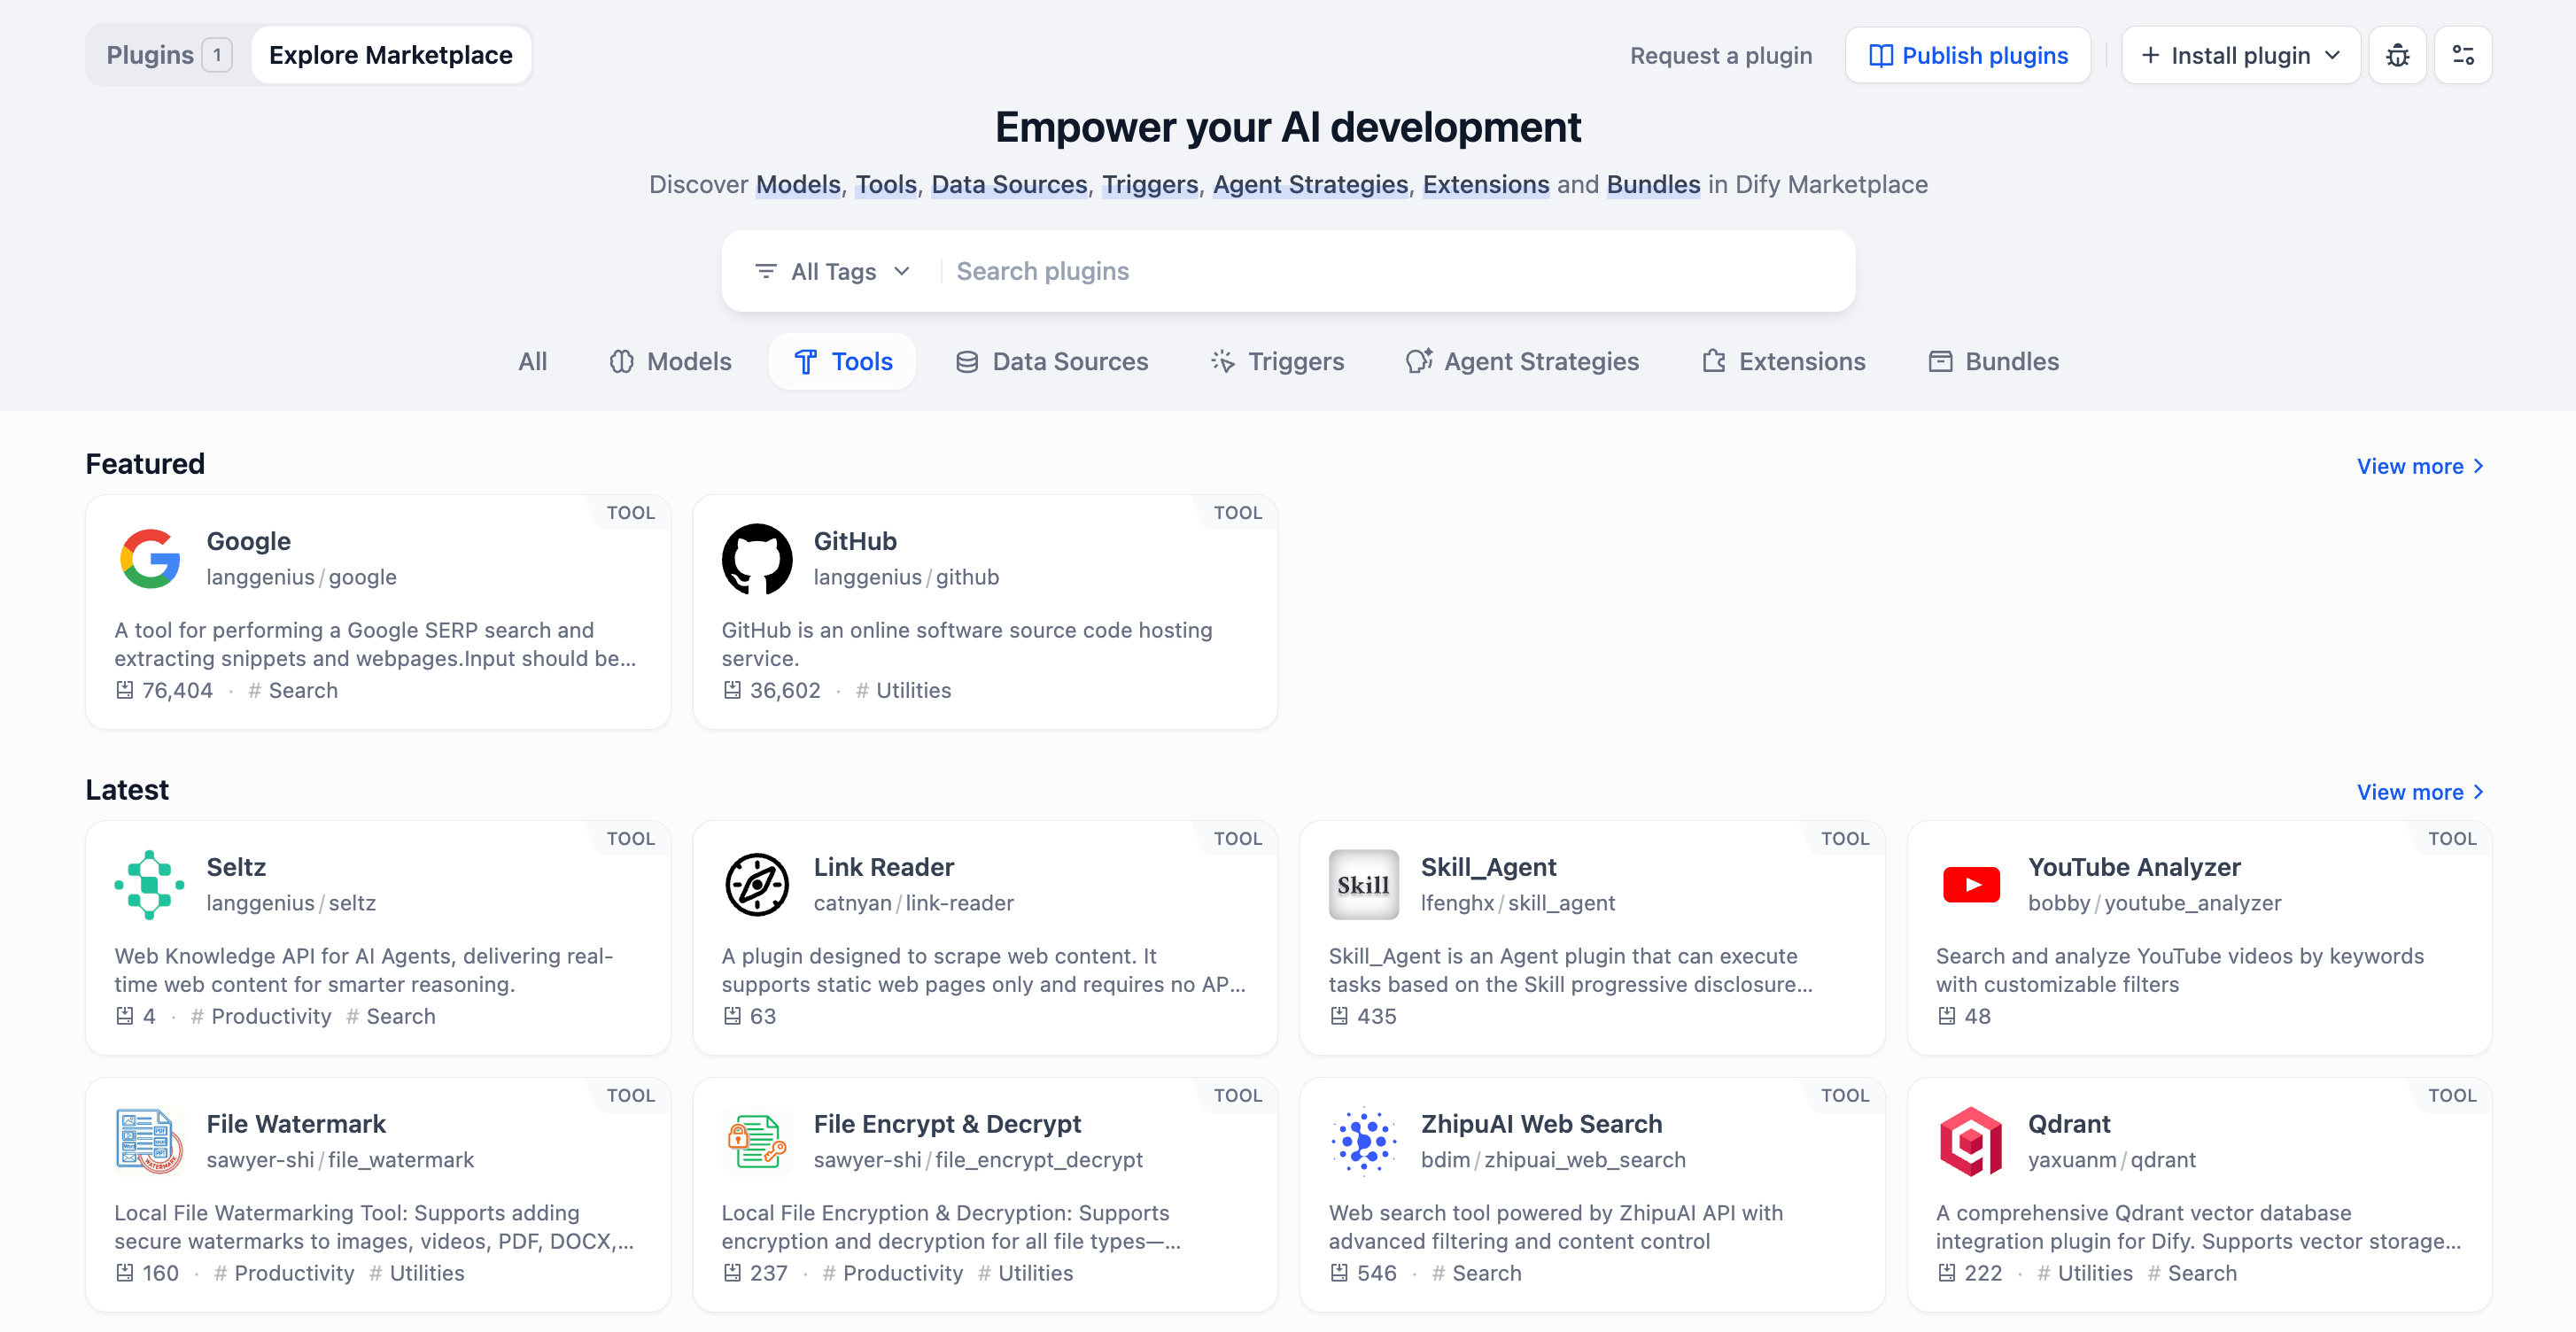 ツールは AI ワークフローに超能力を与えるものです。
[Dify マーケットプレイス](https://marketplace.dify.ai/)はツールのスーパーマーケットのようなものです。Google 検索、天気の確認、画像生成、複雑な計算など、すぐに使える機能が揃っています。数回クリックするだけでインストールしてワークフローに組み込めます。
それでは、現在のワークフローをアップグレードしていきましょう。
### ハンズオン 1:イテレーション内のサブプロセスをアップグレードする
アシスタントに新しいロジックを追加します:まずナレッジベースを確認し、回答が見つからない場合は Google で検索します。
新しいロジックに集中するため、次のノードのみを残しておきましょう:**ユーザー入力、パラメータ抽出器、イテレーション**。
#### ステップ 1:ナレッジベースの照会と判定
1. クリックしてイテレーションノードのサブプロセスエリアに入ります。
2. ナレッジ検索ノードを残し、クエリ変数が `{x} item` であることを確認します。
3. 以前の LLM ノードを削除します。
ナレッジ検索ノードの直後に LLM ノードを追加します。このノードの役割は、ナレッジベースの情報が質問に回答できるかどうかを判定することです。
* **コンテキストセッション**:ナレッジ検索から `Knowledge Retrieval / {x} result Array [Object]` を選択します。
* **System プロンプト**:
```plaintext wrap theme={null}
Based on the `Context`, determine if the answer contains enough information to answer the questions. If the information is insufficient, you MUST reply with: "Information not found in knowledge base".
```
* **User Message**:
```plaintext wrap theme={null}
questions: Iteration/{x} item
```
ツールは AI ワークフローに超能力を与えるものです。
[Dify マーケットプレイス](https://marketplace.dify.ai/)はツールのスーパーマーケットのようなものです。Google 検索、天気の確認、画像生成、複雑な計算など、すぐに使える機能が揃っています。数回クリックするだけでインストールしてワークフローに組み込めます。
それでは、現在のワークフローをアップグレードしていきましょう。
### ハンズオン 1:イテレーション内のサブプロセスをアップグレードする
アシスタントに新しいロジックを追加します:まずナレッジベースを確認し、回答が見つからない場合は Google で検索します。
新しいロジックに集中するため、次のノードのみを残しておきましょう:**ユーザー入力、パラメータ抽出器、イテレーション**。
#### ステップ 1:ナレッジベースの照会と判定
1. クリックしてイテレーションノードのサブプロセスエリアに入ります。
2. ナレッジ検索ノードを残し、クエリ変数が `{x} item` であることを確認します。
3. 以前の LLM ノードを削除します。
ナレッジ検索ノードの直後に LLM ノードを追加します。このノードの役割は、ナレッジベースの情報が質問に回答できるかどうかを判定することです。
* **コンテキストセッション**:ナレッジ検索から `Knowledge Retrieval / {x} result Array [Object]` を選択します。
* **System プロンプト**:
```plaintext wrap theme={null}
Based on the `Context`, determine if the answer contains enough information to answer the questions. If the information is insufficient, you MUST reply with: "Information not found in knowledge base".
```
* **User Message**:
```plaintext wrap theme={null}
questions: Iteration/{x} item
```
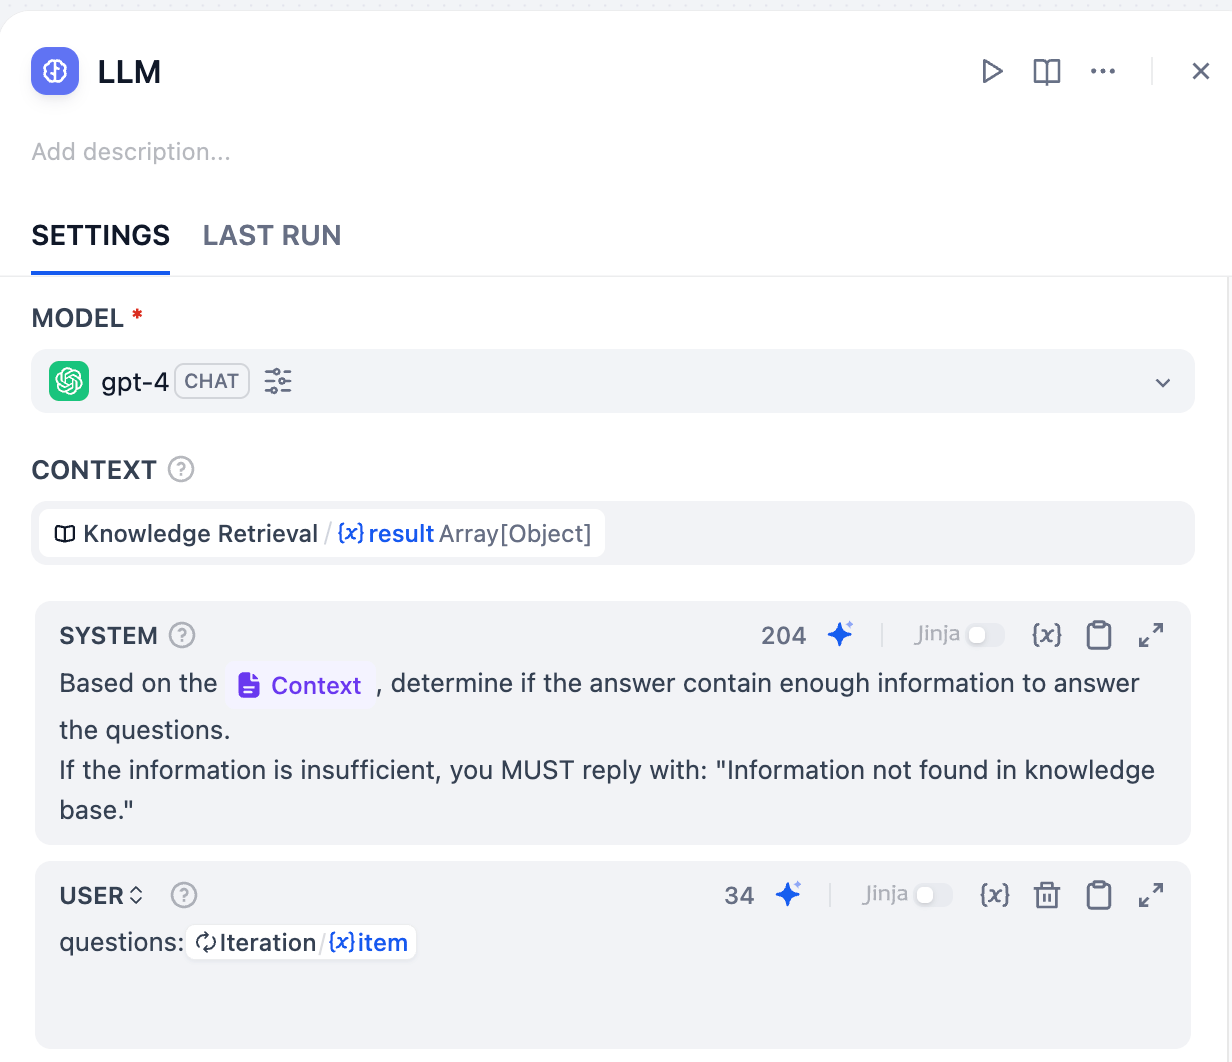 「キャンバス」上ではこのように表示されます。
 #### ステップ 2:分岐点の設定
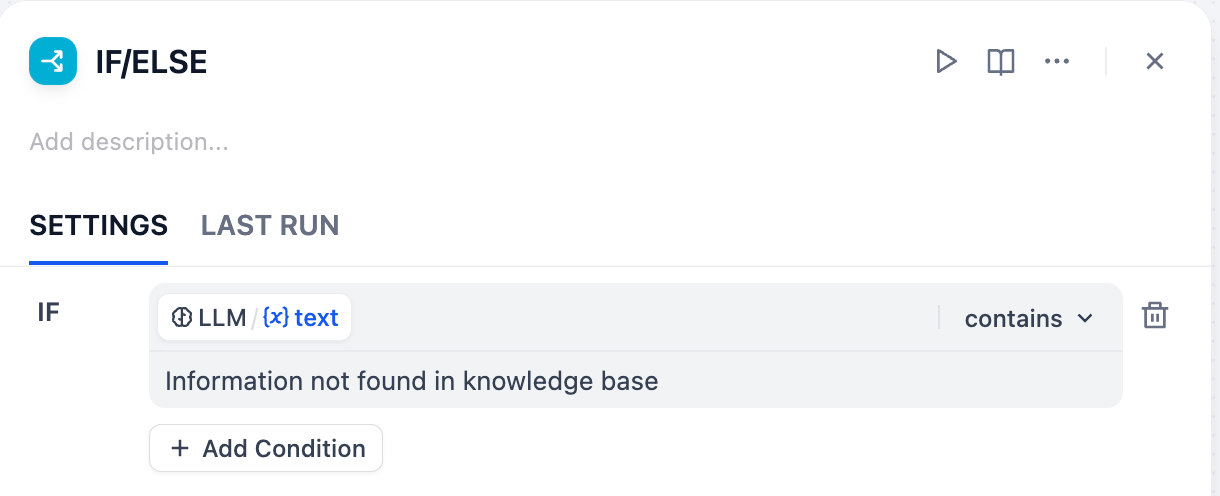
LLM ノードの後に If/Else ノードを追加します。ルールを設定します:LLM の出力が **Information not found in knowledge base** を **含む**場合。
これは、ナレッジベースの情報では回答できない場合を意味します。
#### ステップ 2:分岐点の設定
LLM ノードの後に If/Else ノードを追加します。ルールを設定します:LLM の出力が **Information not found in knowledge base** を **含む**場合。
これは、ナレッジベースの情報では回答できない場合を意味します。
 IF 分岐の後に検索ツールを接続しましょう。これは、ナレッジベースで関連する回答情報が見つからない場合に、ウェブ検索を使って回答を探すことを意味します。
1. IF ノードの後、プラス(+)アイコンをクリックしてツールを選択します。
2. 検索ボックスに Google と入力します。Google にカーソルを合わせ、右側の「インストール」をクリックし、ポップアップウィンドウで再度「インストール」をクリックします。
IF 分岐の後に検索ツールを接続しましょう。これは、ナレッジベースで関連する回答情報が見つからない場合に、ウェブ検索を使って回答を探すことを意味します。
1. IF ノードの後、プラス(+)アイコンをクリックしてツールを選択します。
2. 検索ボックスに Google と入力します。Google にカーソルを合わせ、右側の「インストール」をクリックし、ポップアップウィンドウで再度「インストール」をクリックします。
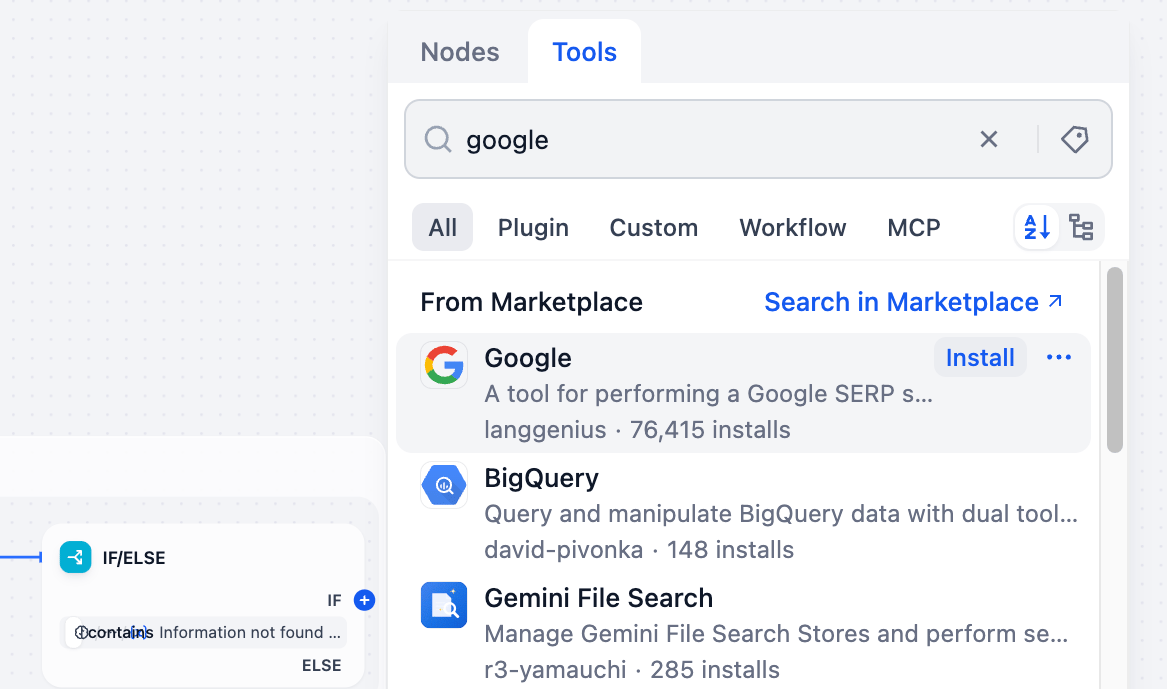 Google 内の Google Search をクリックします。
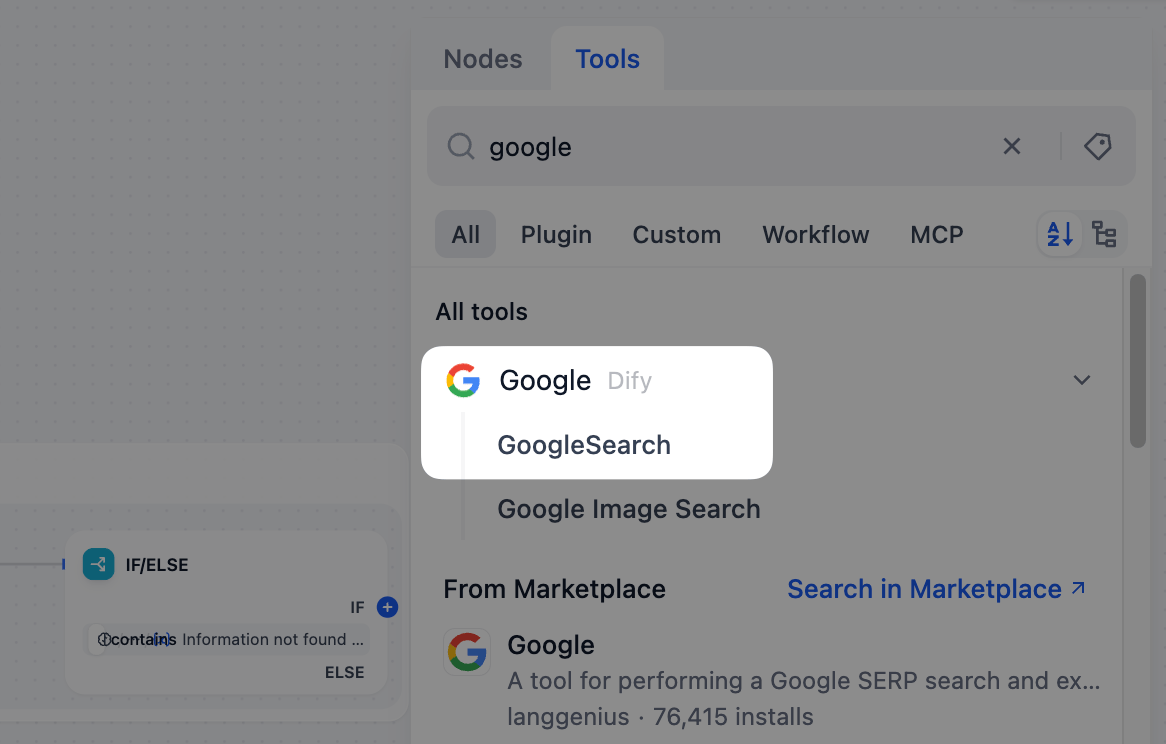 Google Search を初めて使用するには認証が必要です。Wi-Fi のパスワードを入力するようなものです。
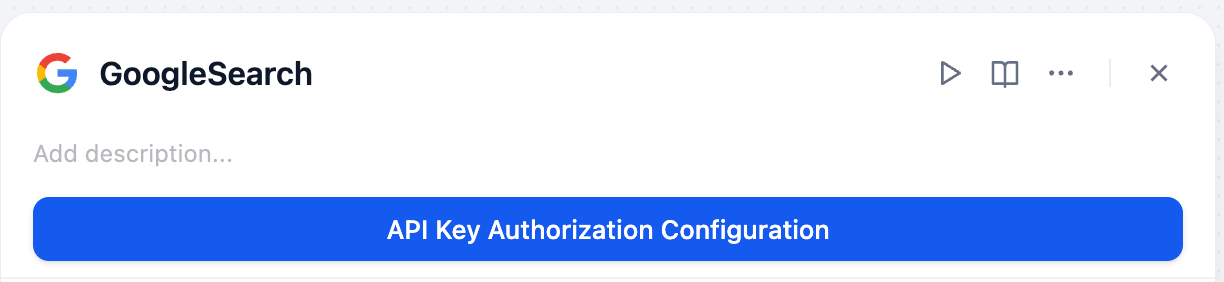 1. 「API Key 認証設定」をクリックし、「SerpApi から SerpApi API key を取得」をクリックします。SerpApi にサインインして、専用の API キーを取得してください。
API キーは外部世界へのパスポートです。安全に保管し、他人と共有しないようにしましょう。
1. 「API Key 認証設定」をクリックし、「SerpApi から SerpApi API key を取得」をクリックします。SerpApi にサインインして、専用の API キーを取得してください。
API キーは外部世界へのパスポートです。安全に保管し、他人と共有しないようにしましょう。
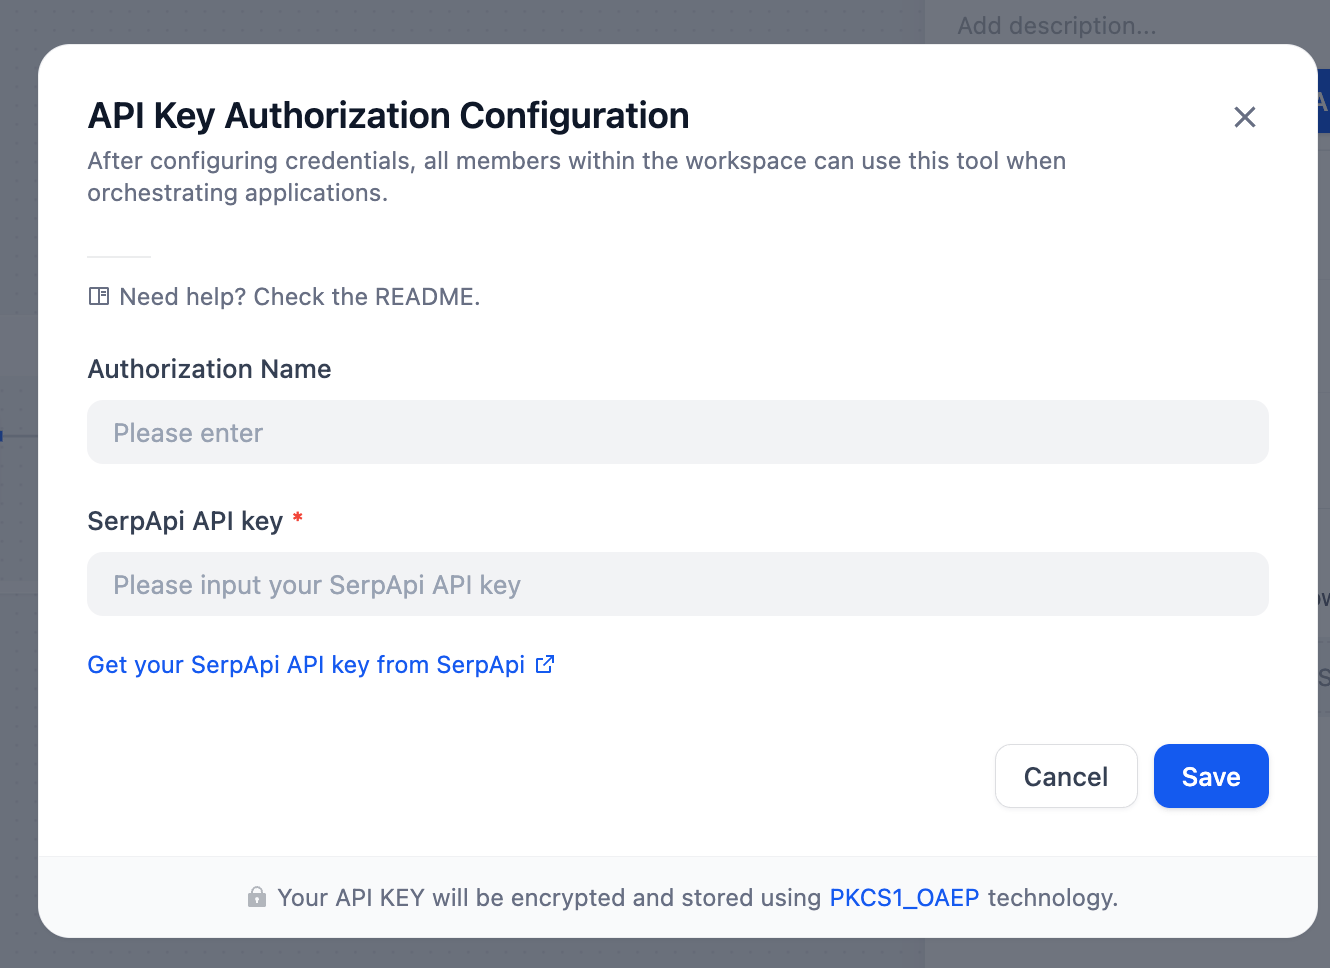 2. API キーをコピーして SerpApi API key に貼り付けます。**Save** をクリックします。
3. API キーの認証が成功すると、設定パネルがすぐに表示されます。Query string フィールドに移動し、`Iteration/{x} item` を選択します。
2. API キーをコピーして SerpApi API key に貼り付けます。**Save** をクリックします。
3. API キーの認証が成功すると、設定パネルがすぐに表示されます。Query string フィールドに移動し、`Iteration/{x} item` を選択します。
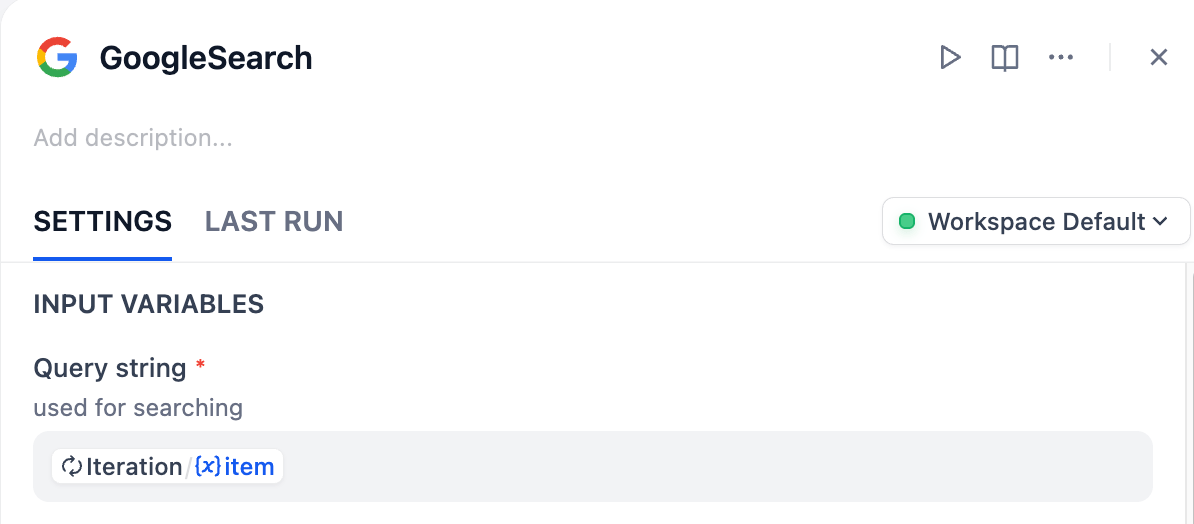 次に、どちらのパスかに応じて異なる回答方法を設定する必要があります。
**検索回答パス**
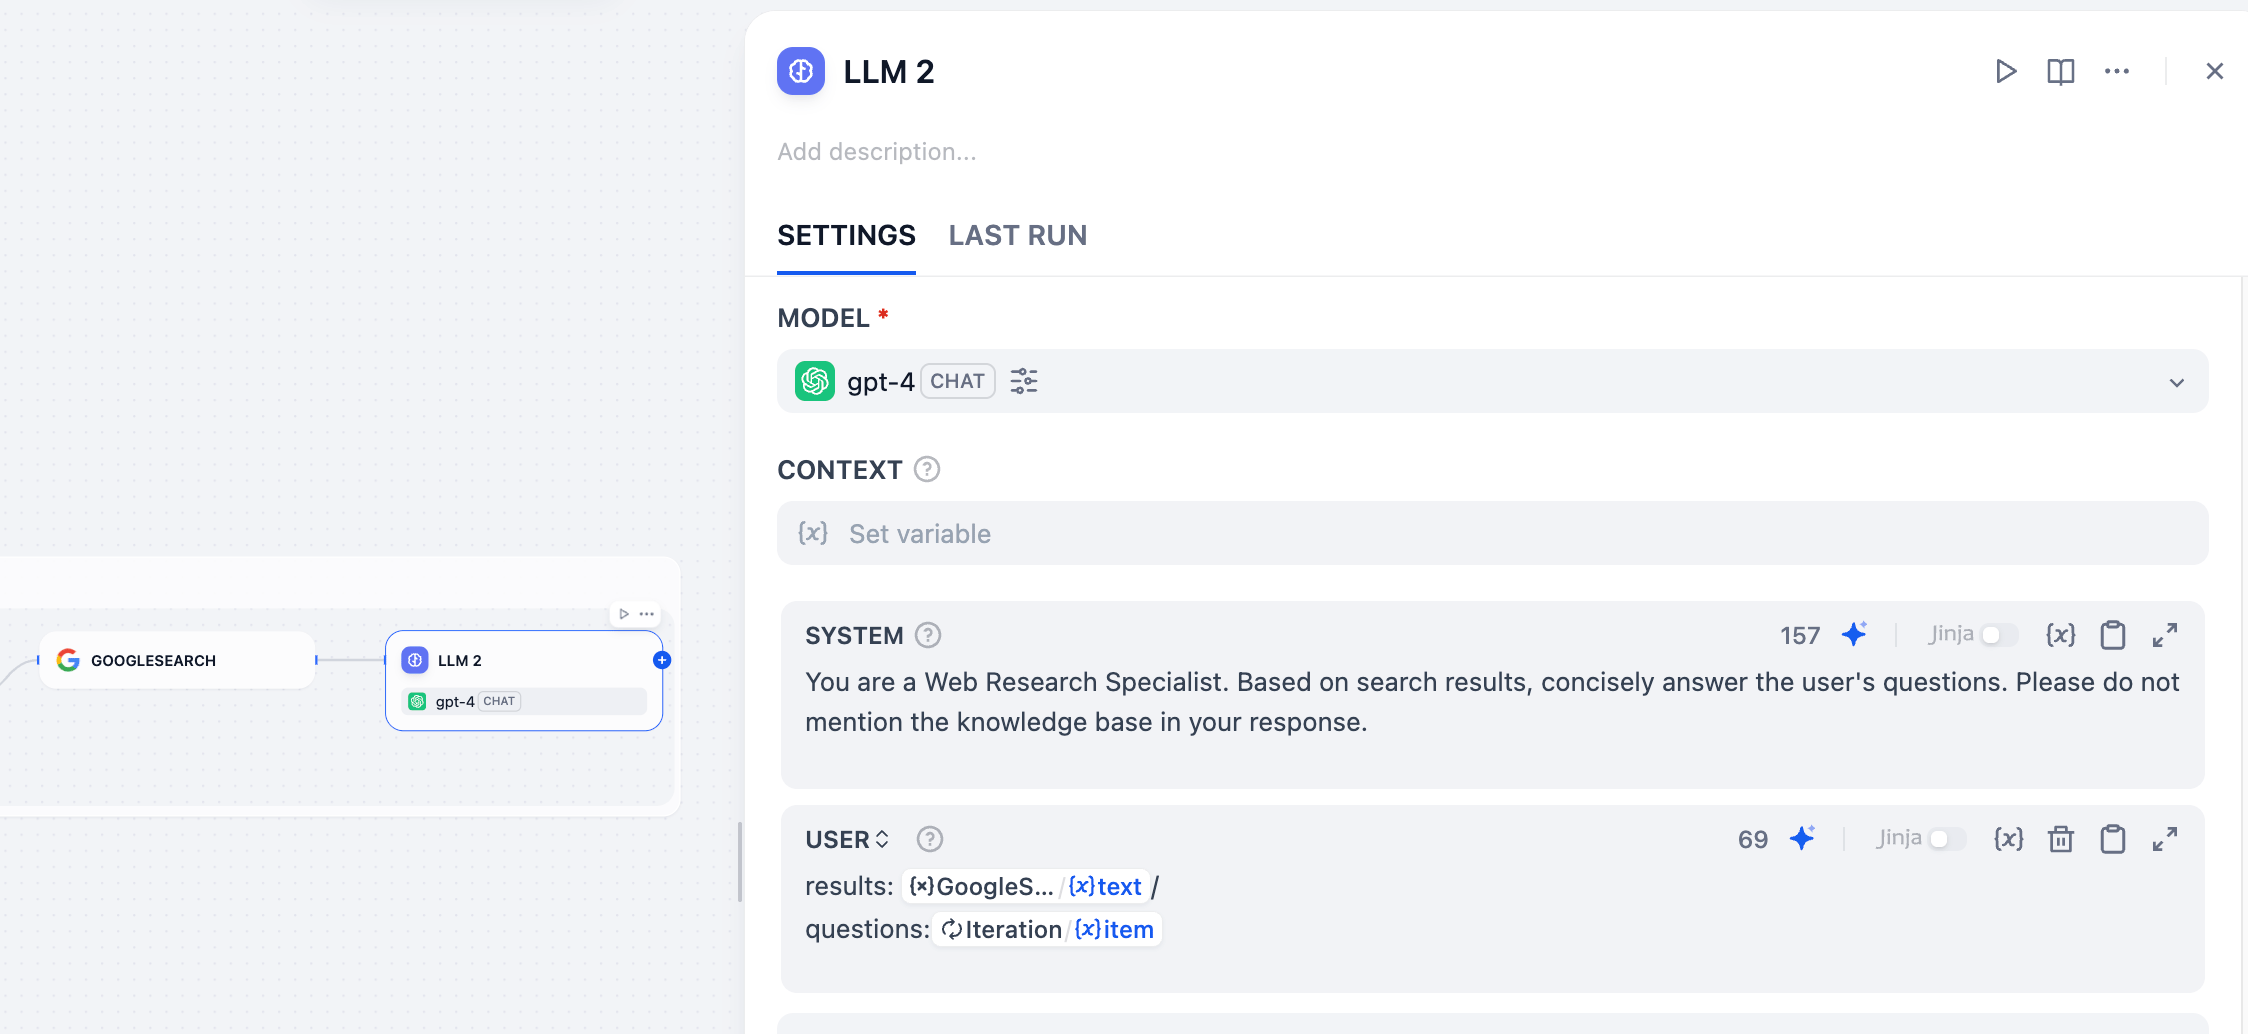
検索結果に基づいて質問に回答するため、新しい LLM ノードを追加します。Google Search ノードに接続してください。
**System**:
```plaintext wrap theme={null}
You are a Web Research Specialist. Based on Google Search, concisely answer the user's questions. Please do not mention the knowledge base in your response.
```
**User Message**:
```plaintext wrap theme={null}
results: GOOGLESEARCH/{x} text
questions: Iteration/{x} item
```
次に、どちらのパスかに応じて異なる回答方法を設定する必要があります。
**検索回答パス**
検索結果に基づいて質問に回答するため、新しい LLM ノードを追加します。Google Search ノードに接続してください。
**System**:
```plaintext wrap theme={null}
You are a Web Research Specialist. Based on Google Search, concisely answer the user's questions. Please do not mention the knowledge base in your response.
```
**User Message**:
```plaintext wrap theme={null}
results: GOOGLESEARCH/{x} text
questions: Iteration/{x} item
```
 **ナレッジベース回答パス**
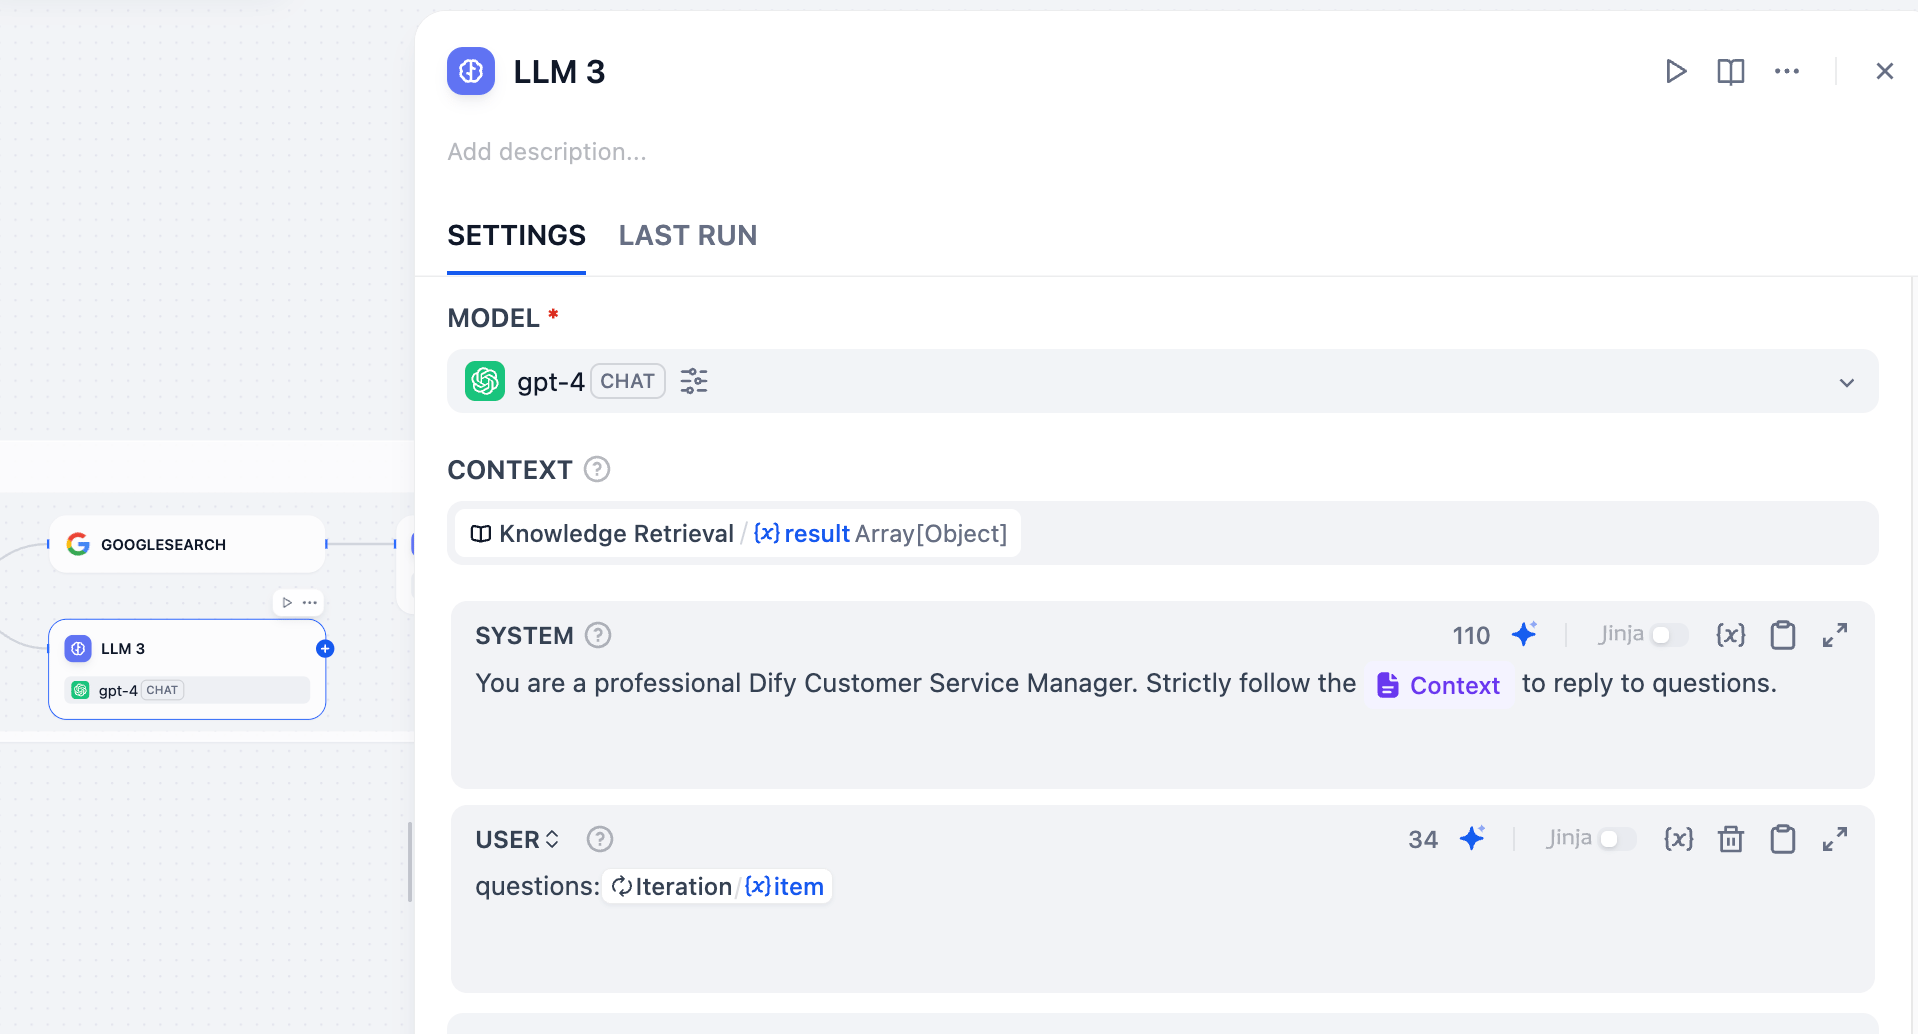
Else ノードの後に、ナレッジベースに基づく回答を処理するための新しい LLM ノードを追加します。
**System**:
```plaintext wrap theme={null}
You are a professional Dify Customer Service Manager. Strictly follow the `Context` to reply to questions.
```
**User Message**:
```plaintext wrap theme={null}
questions: Iteration/{x} item
```
**ナレッジベース回答パス**
Else ノードの後に、ナレッジベースに基づく回答を処理するための新しい LLM ノードを追加します。
**System**:
```plaintext wrap theme={null}
You are a professional Dify Customer Service Manager. Strictly follow the `Context` to reply to questions.
```
**User Message**:
```plaintext wrap theme={null}
questions: Iteration/{x} item
```
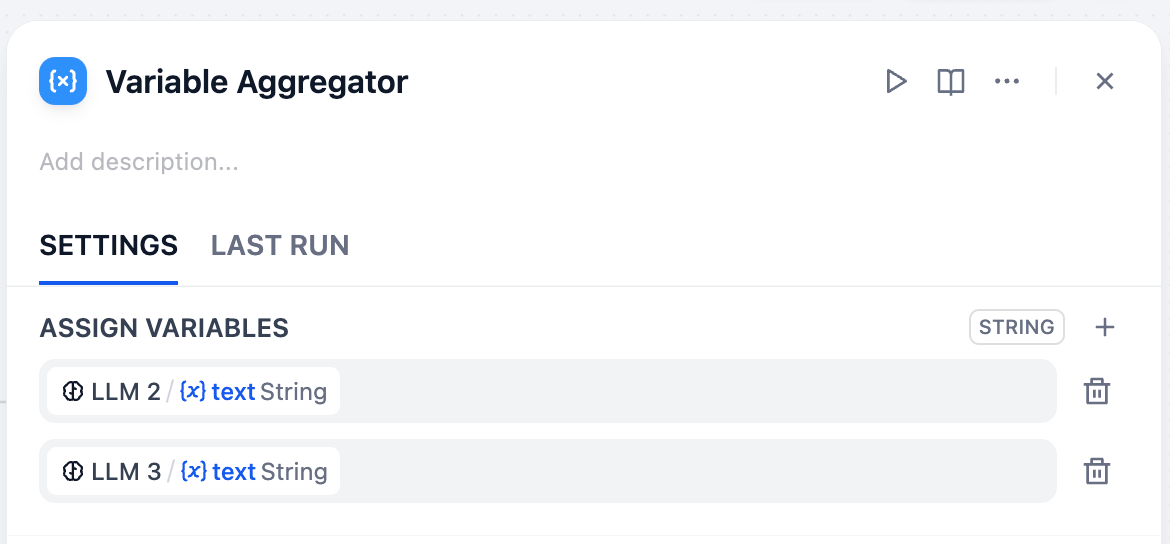
 1. サブプロセス内(イテレーションボックスの内部)の最後に、変数アグリゲーターノードを追加し、LLM 2 と LLM 3 の両方に接続します。
2. 変数アグリゲーターパネルで、変数の割り当てとして `LLM 2/{x}text String` と `LLM 3/{x}text String` を選択します。
このようにして、2 つの可能な回答を 1 つのパスに統合します。
1. サブプロセス内(イテレーションボックスの内部)の最後に、変数アグリゲーターノードを追加し、LLM 2 と LLM 3 の両方に接続します。
2. 変数アグリゲーターパネルで、変数の割り当てとして `LLM 2/{x}text String` と `LLM 3/{x}text String` を選択します。
このようにして、2 つの可能な回答を 1 つのパスに統合します。
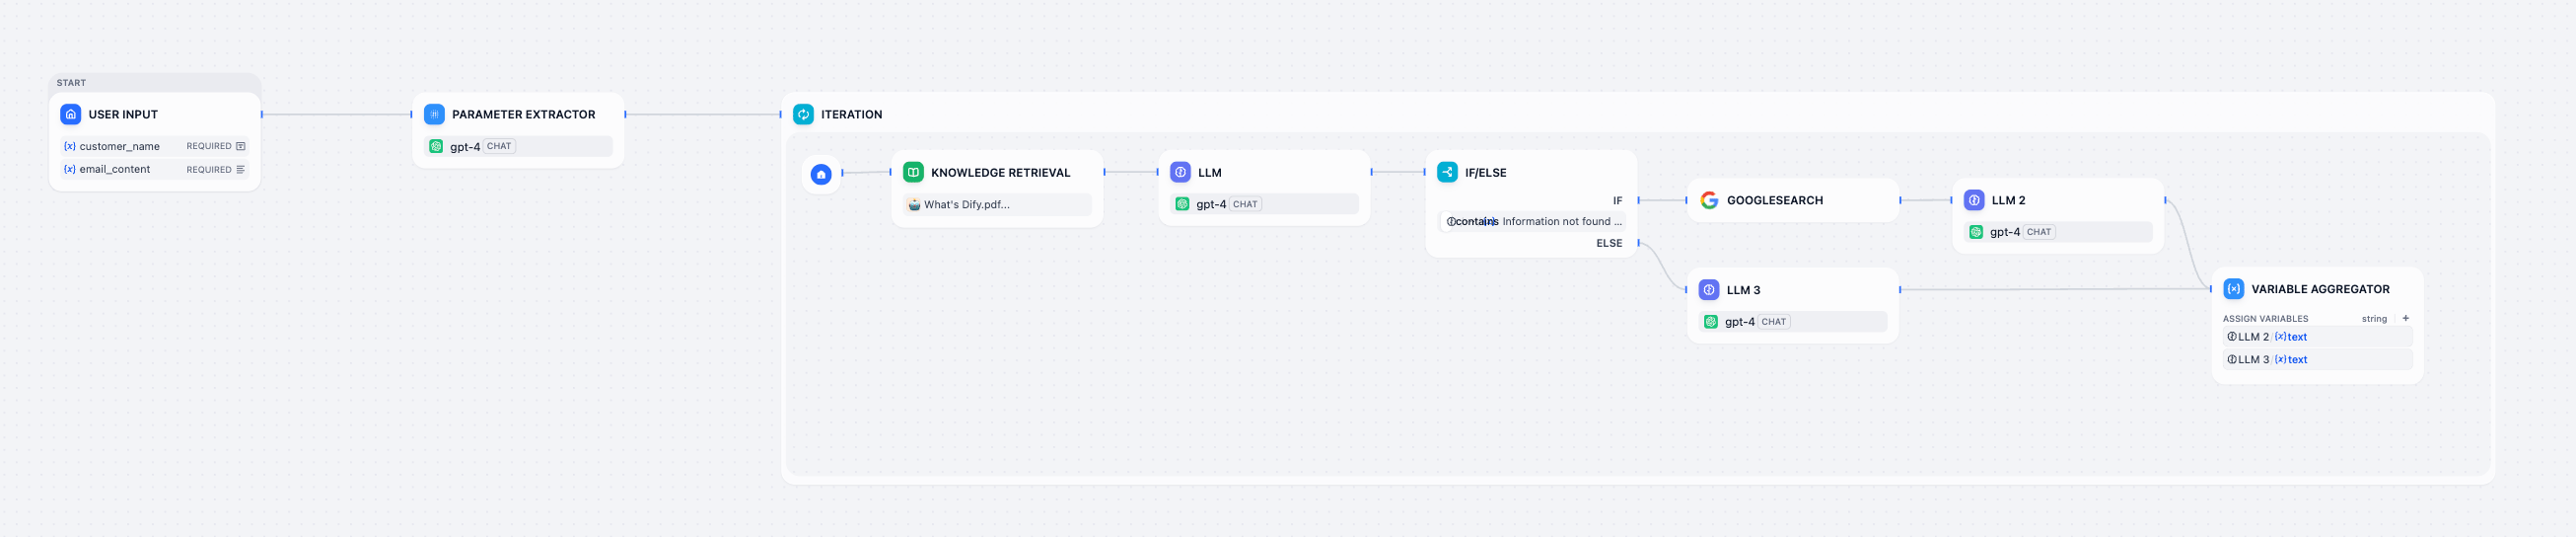
 現在のワークフローはこのようになっています。
 #### ステップ 3:最終的なメール作成
ロジック分岐の処理が完了したので、すべての回答を 1 つの洗練されたメールにまとめましょう。
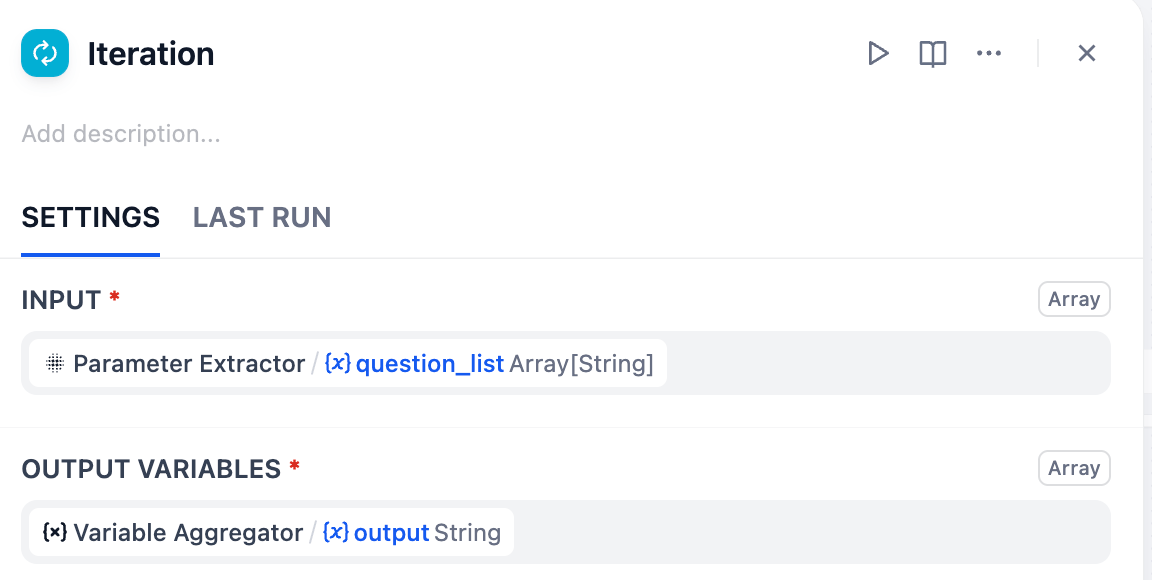
イテレーションノードをクリックし、出力変数として `{x}Variable Aggregator/{x}output String` を設定します。
#### ステップ 3:最終的なメール作成
ロジック分岐の処理が完了したので、すべての回答を 1 つの洗練されたメールにまとめましょう。
イテレーションノードをクリックし、出力変数として `{x}Variable Aggregator/{x}output String` を設定します。
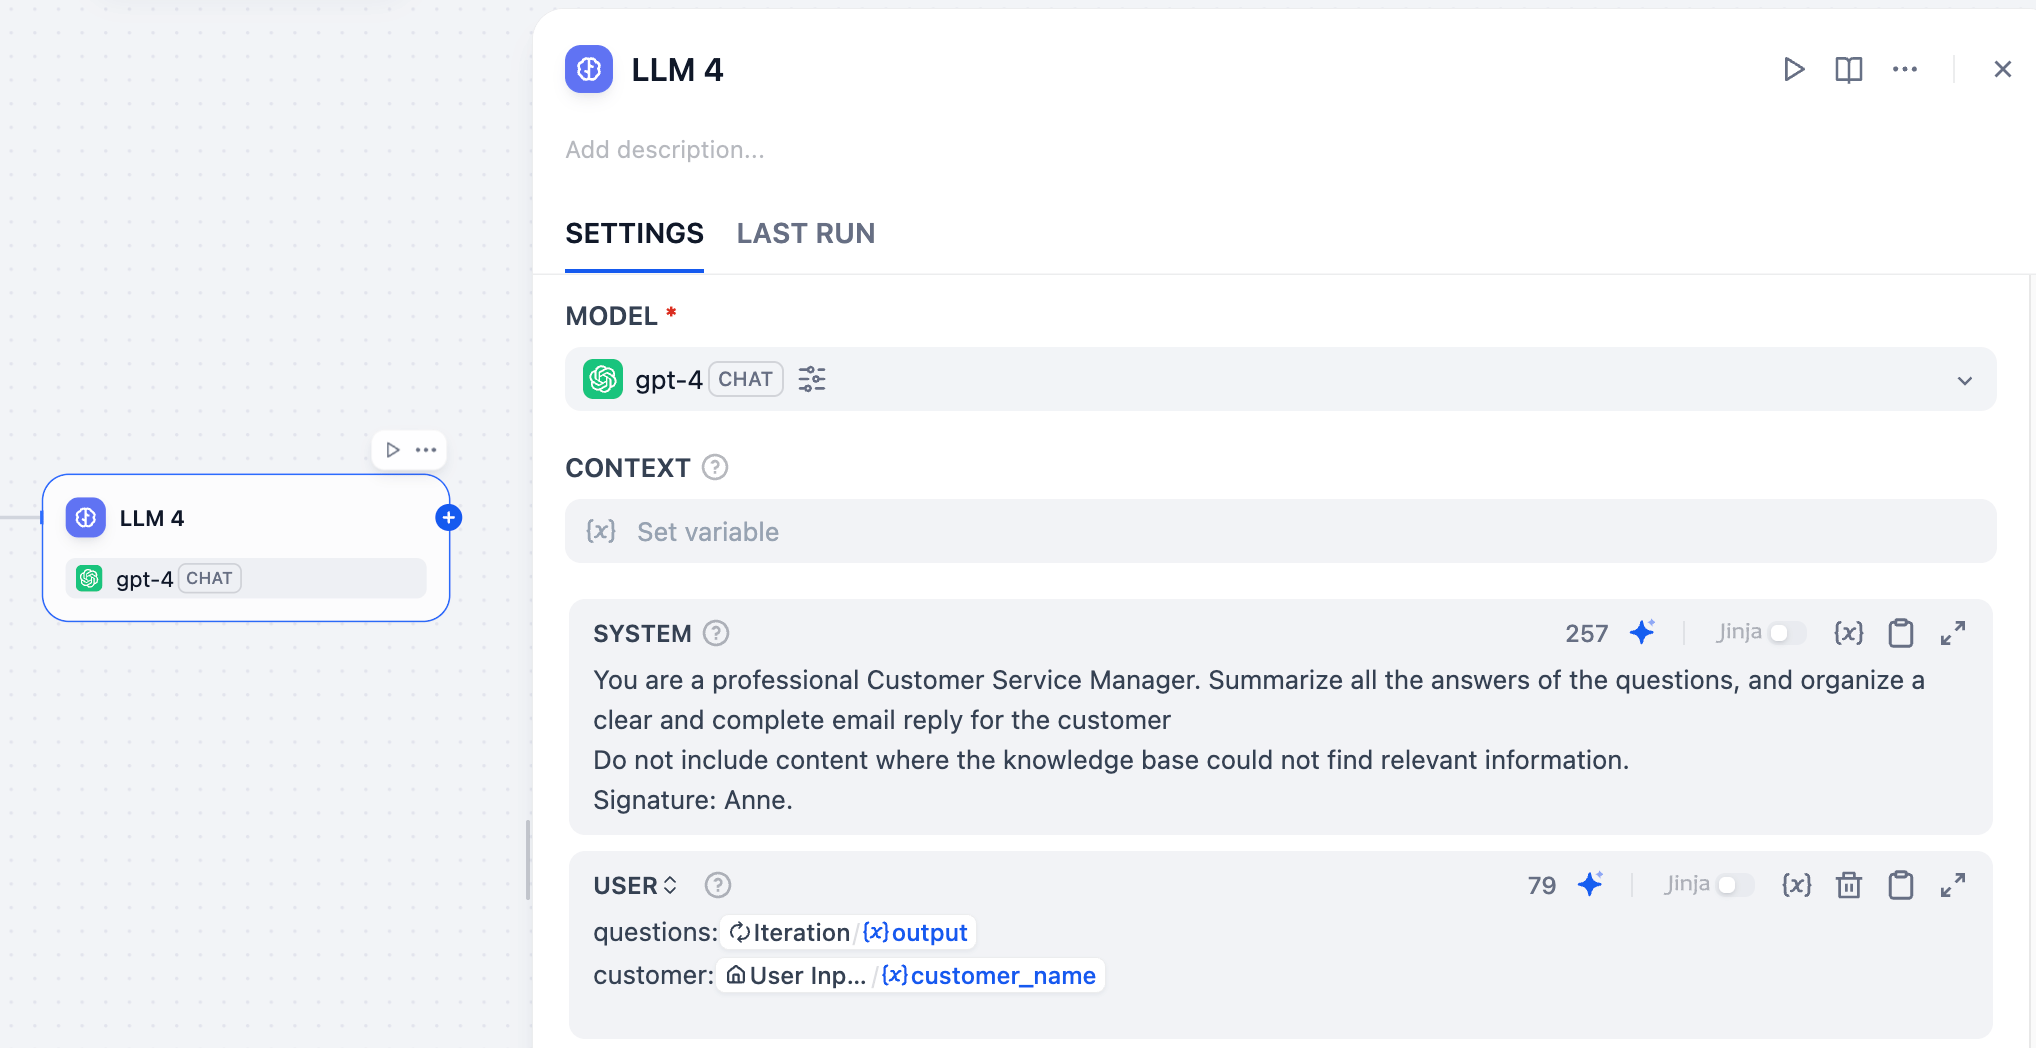
 イテレーションノードの後に、すべての出力を要約するための新しい LLM ノードを接続します。以下のプロンプトを参考にしてください。
**System**:
```plaintext wrap theme={null}
You are a professional Customer Service Manager. Summarize all the answers of the questions, and organize a clear and complete email reply for the customer.
Do not include content where the knowledge base could not find relevant information.
Signature: Anne.
```
**User Message**:
```plaintext wrap theme={null}
questions: Iteration/ {x} output
customer: User Input / {x} customer_name
```
イテレーションノードの後に、すべての出力を要約するための新しい LLM ノードを接続します。以下のプロンプトを参考にしてください。
**System**:
```plaintext wrap theme={null}
You are a professional Customer Service Manager. Summarize all the answers of the questions, and organize a clear and complete email reply for the customer.
Do not include content where the knowledge base could not find relevant information.
Signature: Anne.
```
**User Message**:
```plaintext wrap theme={null}
questions: Iteration/ {x} output
customer: User Input / {x} customer_name
```
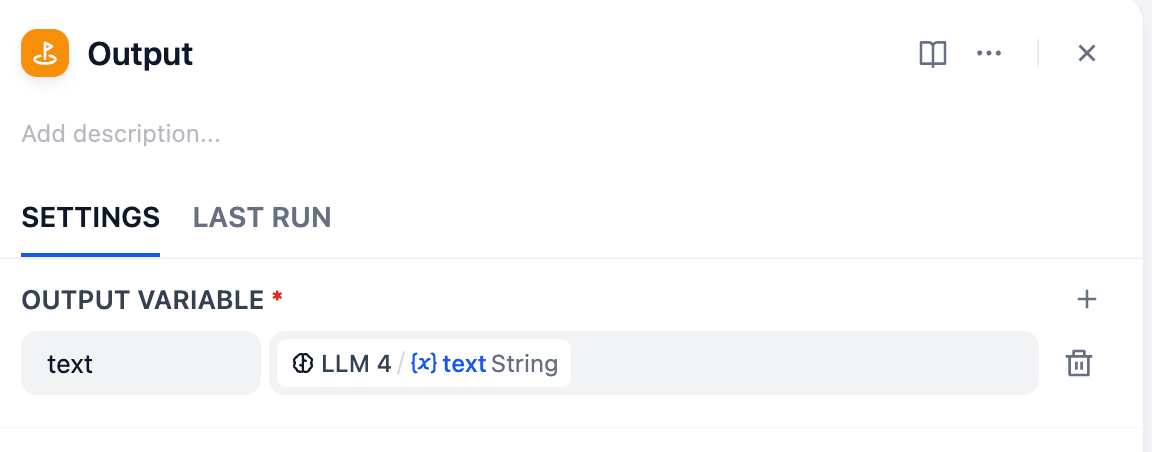
 LLM ノードの後に End ノードを追加します。出力変数を `LLM 4/{x}text String` に設定します。
 これでワークフローのセットアップと設定がすべて完了しました。メールアシスタントは、ナレッジベースに基づいて質問に回答し、必要に応じて Google Search で補足的な回答を検索できるようになりました。
 ナレッジベースに確実に載っていない質問を含むメールを送信してみましょう。AI が Google を使って関連する回答を見つけられるか確認してください。
## ミニチャレンジ
1. If/Else ノードで選択できる他の条件にはどのようなものがありますか?
2. マーケットプレイスを閲覧して、このワークフローに追加できる別のツールを見つけてみましょう。
ナレッジベースに確実に載っていない質問を含むメールを送信してみましょう。AI が Google を使って関連する回答を見つけられるか確認してください。
## ミニチャレンジ
1. If/Else ノードで選択できる他の条件にはどのようなものがありますか?
2. マーケットプレイスを閲覧して、このワークフローに追加できる別のツールを見つけてみましょう。