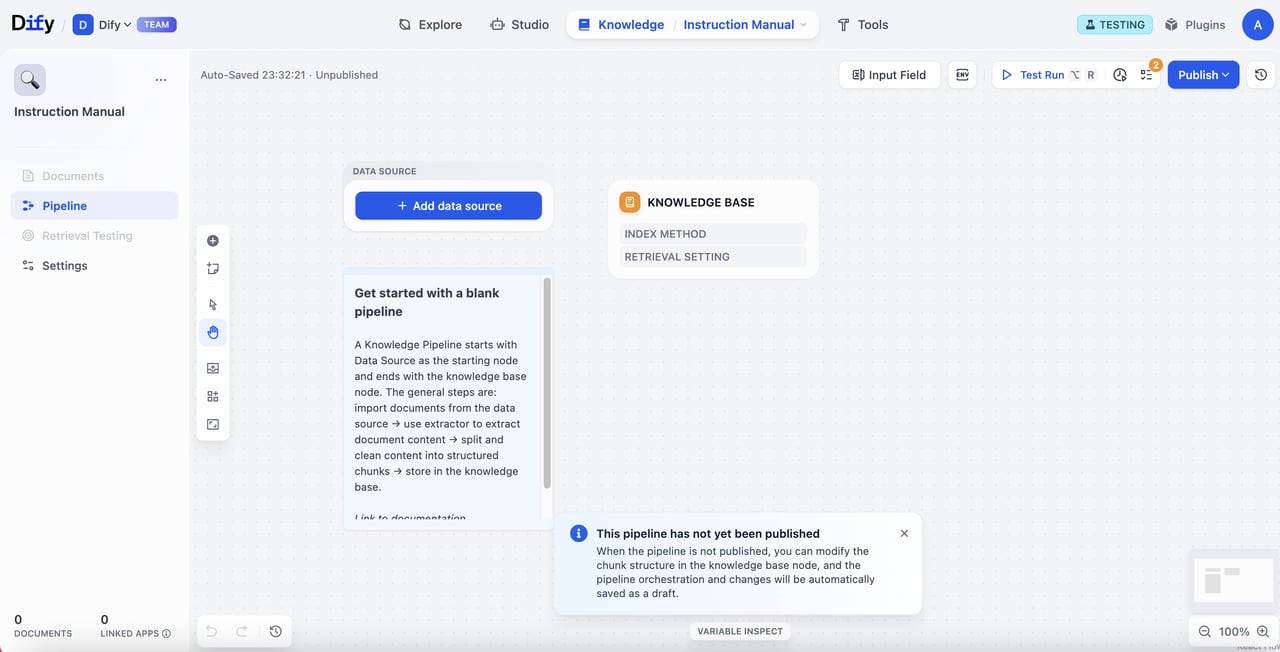
Interface Status
When entering the knowledge pipeline orchestration canvas, you’ll see:- Tab Status: Documents, Retrieval Test, and Settings tabs will be grayed out and unavailable at the moment
- Essential Steps: You must complete knowledge pipeline orchestration and publishing before uploading files
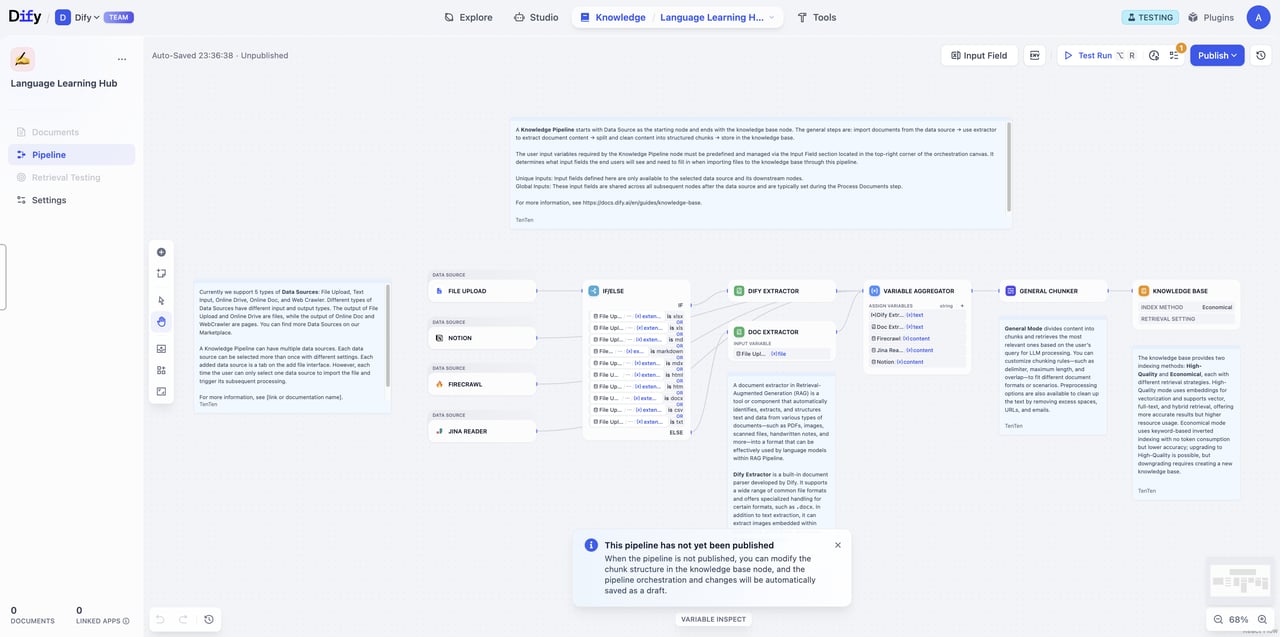
The Complete Knowledge Pipeline Process
Before we get started, let’s break down the knowledge pipeline process to understand how your documents are transformed into a searchable knowledge base. The knowledge pipeline includes these key steps:- Data Source: Content from various data sources (local files, Notion, web pages, etc.)
- Data Processing: Process and transform data content
- Extractor: Parse and structure document content
- Chunker: Split structured content into manageable segments
- Knowledge Base: Set up chunk structure and retrieval settings
- User Input Field: Define parameters that pipeline users need to input for data processing
- Test & Publish: Validate and officially activate the knowledge base
Step 1: Data Source
In a knowledge base, you can choose single or multiple data sources. Currently, Dify supports 4 types of data sources: file upload, online drive, online documents, and web crawler. Visit the Dify Marketplace for more data sources.File Upload
Upload local files through drag-and-drop or file selection.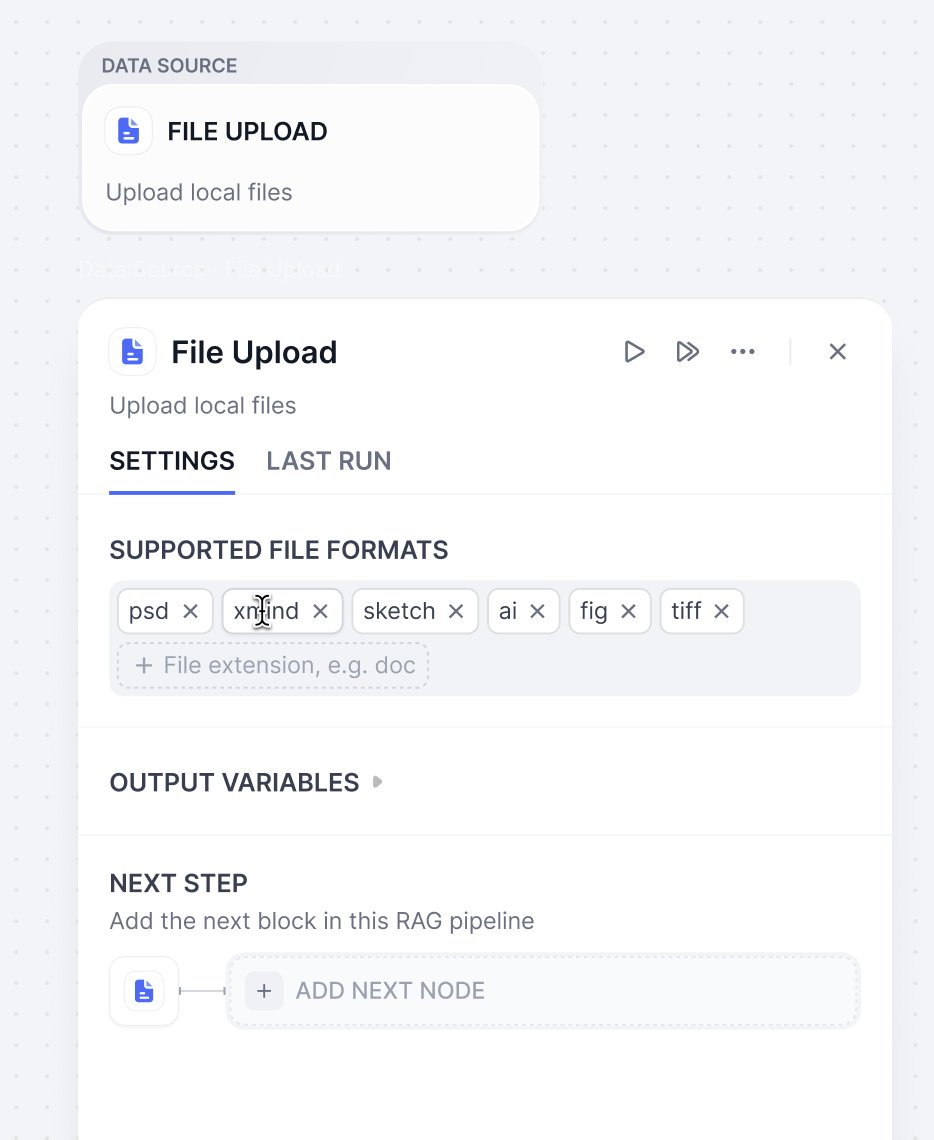
Configuration Options
Limitations
Output Variables
Online Document
Notion
Integrate with your Notion workspace to seamlessly import pages and databases, always keeping your knowledge base automatically updated.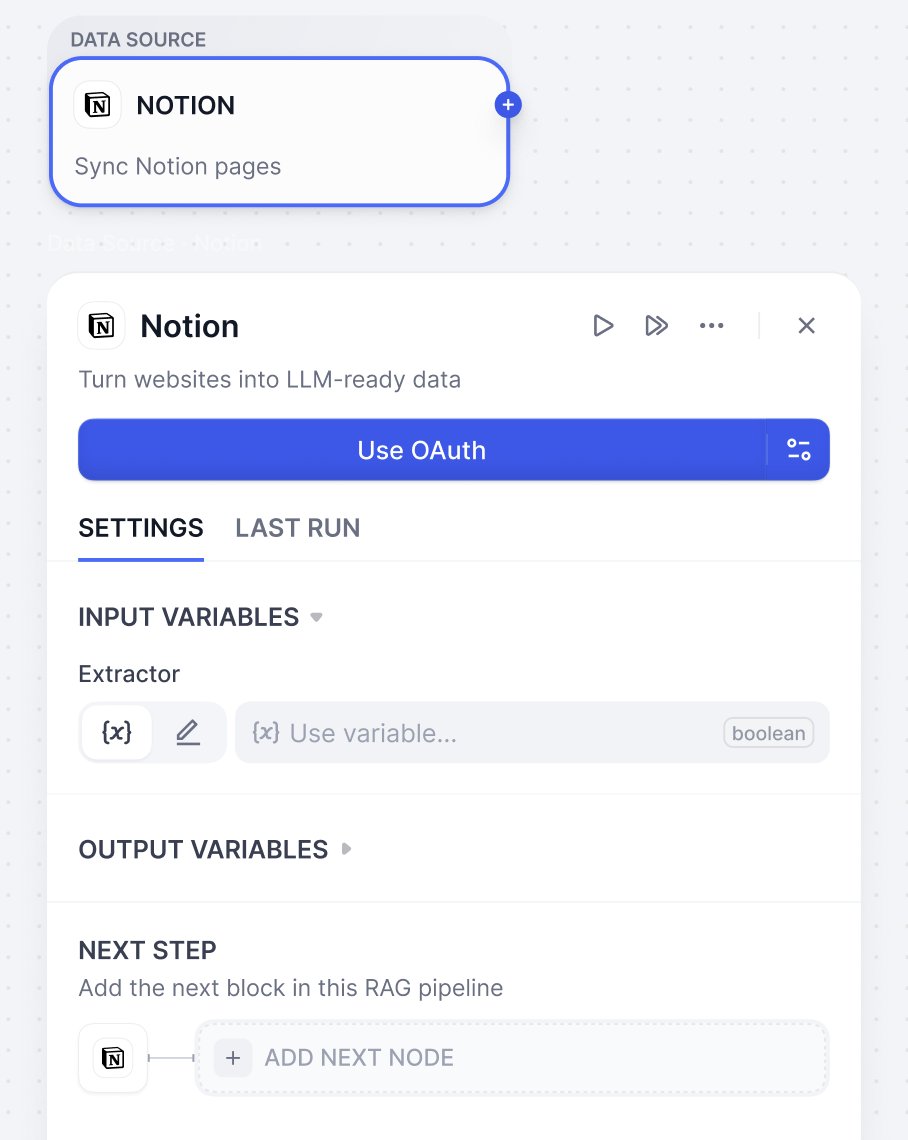
Configuration Options
Web Crawler
Transform web content into formats that can be easily read by large language models. The knowledge base supports Jina Reader and Firecrawl.Jina Reader
An open-source web parsing tool providing simple and easy-to-use API services, suitable for fast crawling and processing web content.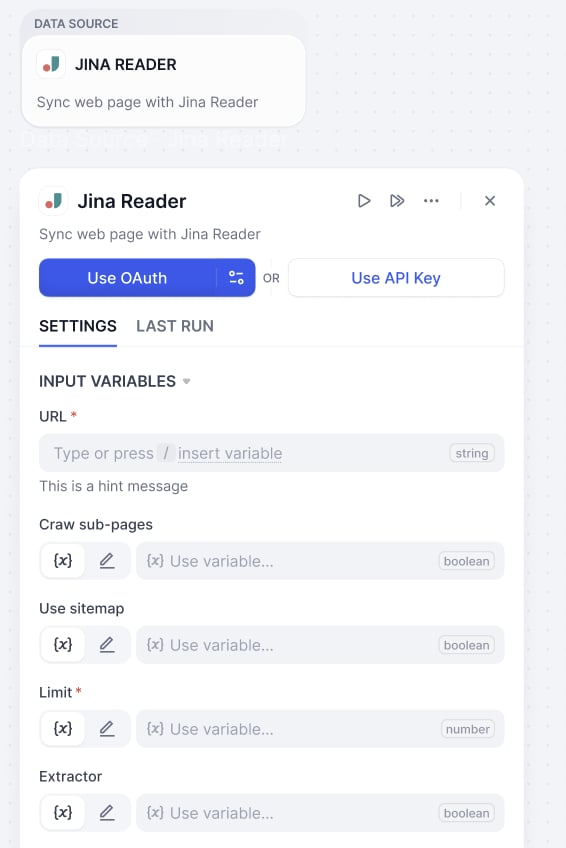
Parameter Configuration
Firecrawl
An open-source web parsing tool that provides more refined crawling control options and API services. It supports deep crawling of complex website structures, recommended for batch processing and precise control.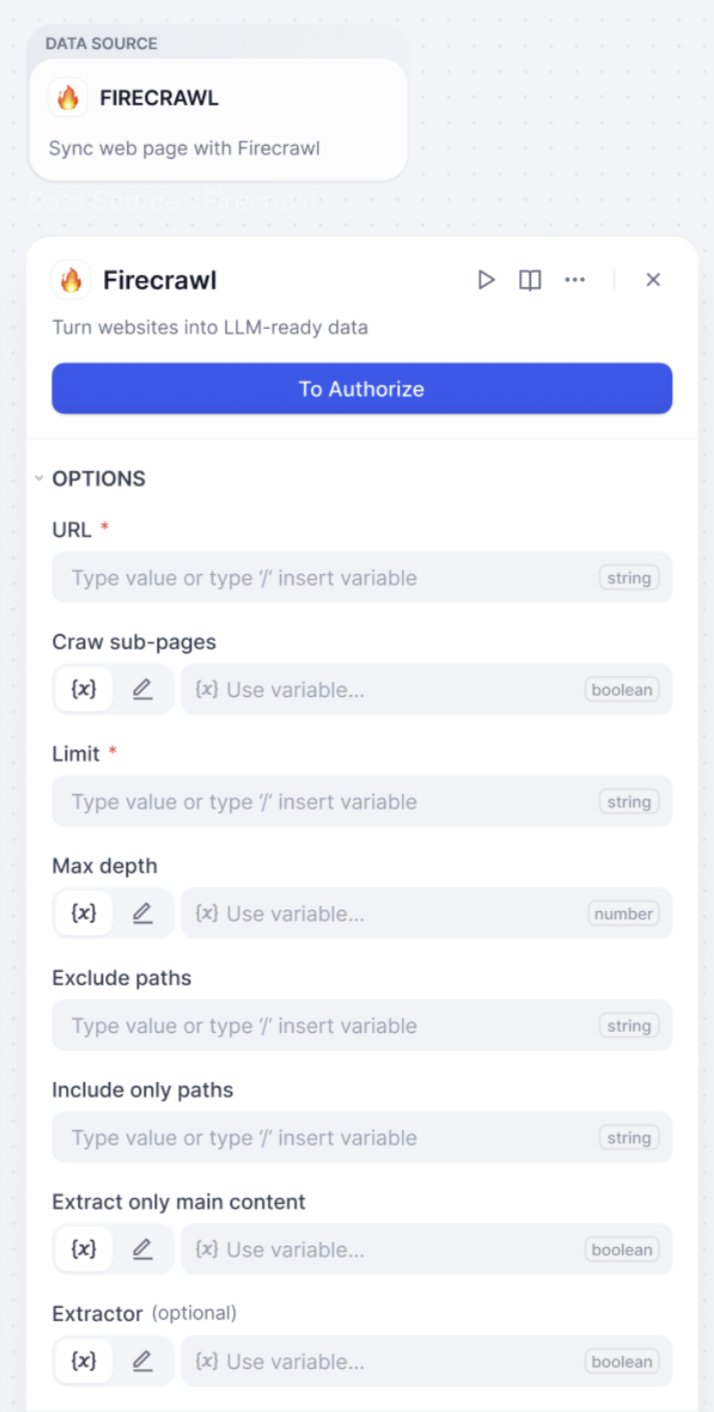
Parameter Configuration
Online Drive
Connect your online cloud storage services (e.g., Google Drive, Dropbox, OneDrive) and let Dify automatically retrieve your files. Simply select and import the documents you need for processing, without manually downloading and re-uploading files.Step 2: Set Up Data Processing Tools
In this stage, these tools extract, chunk, and transform the content for optimal knowledge base storage and retrieval. Think of this step like meal preparation. We clean raw materials up, chop them into bite-sized pieces, and organize everything, so the dish can be cooked up quickly when someone orders it.Doc Processor
Documents come in different formats - PDF, XLSX, DOCX. However, LLM can’t read these files directly. That’s where extractors come in. They support multiple formats and handle the conversion, so your content is ready for the next step of the LLMs. You can choose Dify’s Doc Extractor to process files, or select tools based on your needs from Marketplace which offers Dify Extractor and third-party tools such as Unstructured.For images in documents
For images in documents
Images in documents can be extracted using appropriate document processors. Extracted images are attached to their corresponding chunks, can be managed independently, and are returned alongside those chunks during retrieval.URLs of extracted images remain in the chunk text, but you can safely remove these URLs to keep the text clean—this won’t affect the extracted images.Each chunk supports up to 10 image attachments; images beyond this limit will not be extracted.If no images are extracted by the selected processor, Dify will automatically extract JPG, JPEG, PNG, and GIF images under 2 MB that are referenced via accessible URLs using the following Markdown syntax:

Doc Extractor

Dify Extractor
Dify Extractor is a built-in document parser presented by Dify. It supports multiple common file formats and is specially optimized for Doc files. It can extract and store images from documents and return image URLs.
Unstructured
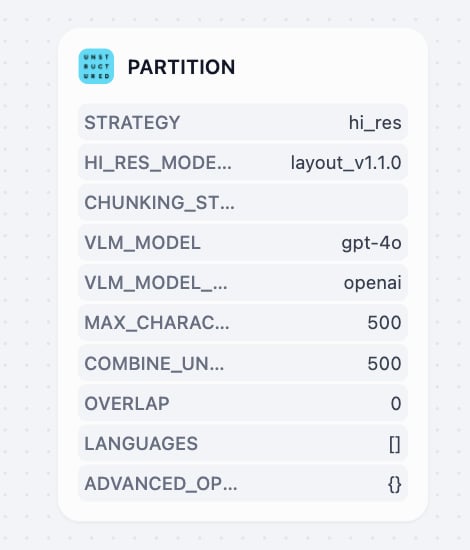
Unstructured transforms documents into structured, machine-readable formats with highly customizable processing strategies. It offers multiple extraction strategies (auto, hi_res, fast, OCR-only) and chunking methods (by_title, by_page, by_similarity) to handle diverse document types, offering detailed element-level metadata including coordinates, confidence scores, and layout information. It’s recommended for enterprise document workflows, processing of mixed file types, and cases that require precise control over document processing parameters.
Chunker
Similar to human limited attention span, large language models cannot process huge amount of information simultaneously. Therefore, after information extraction, the chunker splits large document content into smaller and manageable segments (called “chunks”). Different documents require different chunking strategies. A product manual works best when split by product features, while research papers should be divided by logical sections. Dify offers 3 types of chunkers for various document types and use cases.Overview of Different Chunkers
Common Text Pre-processing Rules
All chunkers support these text cleaning options:General Chunker
Basic document chunking processing, suitable for documents with relatively simple structures. You can configure text chunking and text preprocessing rules according to the following configuration. Input and Output Variable
Chunk Settings
Parent-child Chunker
By using a dual-layer segmentation structure to resolve the contradiction between context and accuracy, parent-child clunker achieves the balance between precise matching and comprehensive contextual information in Retrieval Augmented Generation (RAG) systems. How Parent-child Chunker Works Child Chunks for query matching: Small, precise information segments (usually single sentences) to match user queries with high accuracy. Parent Chunks provide rich context: Larger content blocks (paragraphs, sections, or entire documents) that contain the matching child chunks, giving the large language model (LLM) comprehensive background information.
Chunk Settings
Q&A Processor
Combining extraction and chunking in one node, Q&A Processor is specifically designed for structured Q&A datasets from CSV and Excel files. Perfect for FAQ lists, shift schedules, and any spreadsheet data with clear question-answer pairs. Input and Output Variable
Variable Configuration
Step 3: Configure Knowledge Base Node
Now that your documents are processed and chunked, it’s time to set up how they’ll be stored and retrieved. Here, you can select different indexing methods and retrieval strategies based on your specific needs. Knowledge base node configuration includes: Input Variable, Chunk Structure, Index Method, and Retrieval Settings.Chunk Structure
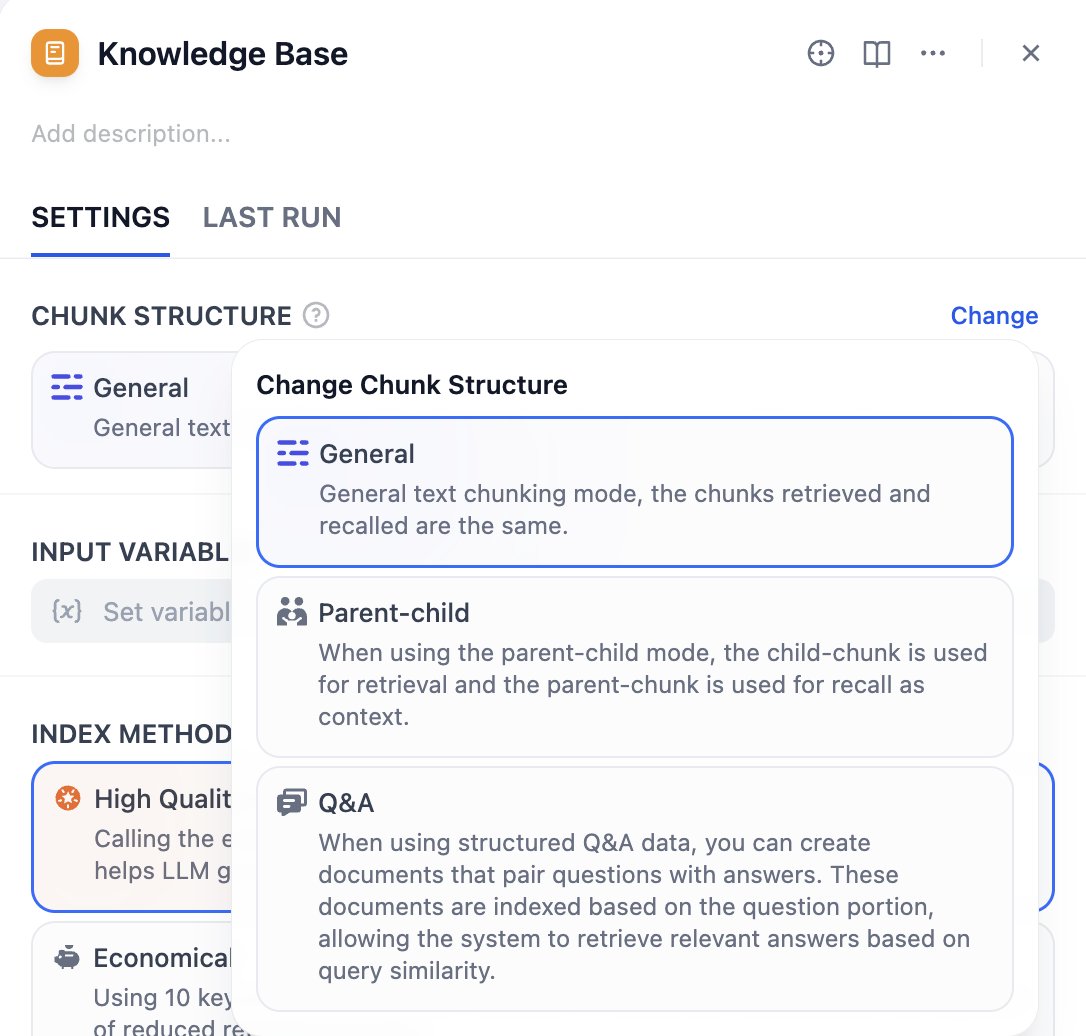
General Mode
Suitable for most standard document processing scenarios. It provides flexible indexing options—you can choose appropriate indexing methods based on different quality and cost requirements. General mode supports both high-quality and economical indexing methods, as well as various retrieval settings.Parent-child Mode
It provides precise matching and corresponding contextual information during retrieval, suitable for professional documents that need to maintain complete context. Parent-child mode supports HQ (High Quality) mode only, offering child chunks for query matching and parent chunks for contextual information during retrieval.Q&A Mode
Create documents that pair questions with answers when using structured question-answer data. These documents are indexed based on the question portion, enabling the system to retrieve relevant answers based on query similarity. Q&A Mode supports HQ (High Quality) mode only.Input Variable
Input variables receive processing results from data processing nodes as the data source for knowledge base. You need to connect the output from chunker to the knowledge base as input. The node supports different types of standard inputs based on the selected chunk structure:- General Mode: x Array[Chunk] - General chunk array
- Parent-child Mode: x Array[ParentChunk] - Parent chunk array
- Q&A Mode: x Array[QAChunk] - Q&A chunk array
Index Method & Retrieval Settings
The index method determines how your knowledge base builds content indexes, while retrieval settings provide corresponding retrieval strategies based on the selected index method. Think of it in this way: the index method determines how to organize your documents, while retrieval settings tell users what methods they can use to find documents. The knowledge base provides two index methods: High Quality and Economical, each offering different retrieval setting options. The High Quality method uses embedding models to convert chunks into numerical vectors, helping to compress and store large amounts of information more effectively. This enables the system to find semantically relevant accurate answers even when the user’s question wording doesn’t exactly match the document.To enable cross-modal retrieval—retrieving both text and images based on semantic relevance—select a multimodal embedding model (marked with a Vision icon). Images extracted from documents will then be embedded and indexed for retrieval.Knowledge bases using such embedding models are labeled Multimodal on their cards.
For more details, see Specify the Index Method and Retrieval Settings.
If the selected embedding model is multimodal, select a multimodal rerank model (marked with a Vision icon) as well. Otherwise, retrieved images will be excluded from reranking and the retrieval results.
Step 4: Create User Input Form
User input forms are essential for collecting the initial information your pipeline needs to run effectively. Similar to the User Input node in workflow, this form gathers necessary details from users - such as files to upload, specific parameters for document processing - ensuring your pipeline has all the information it needs to deliver accurate results. This way, you can create specialized input forms for different use scenarios, improving pipeline flexibility and usability for various data sources or document processing steps.Create User Input Form
There’re two ways to create user input field:-
Pipeline Orchestration Interface
Click on the Input field to start creating and configuring input forms.\
-
Node Parameter Panel
Select a node. Then, in parameter input on the right-side panel, click + Create user input for new input items. New input items will also be collected in the Input Field. 
Add User Input Fields
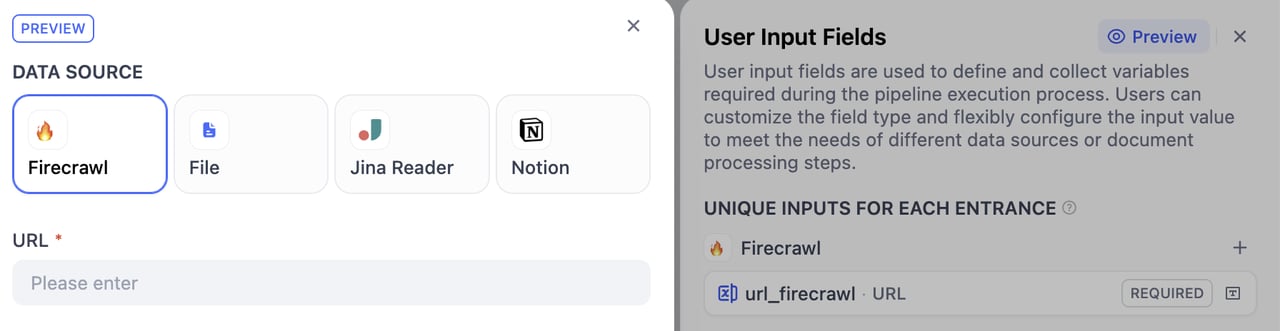
Unique Inputs for Each Entrance
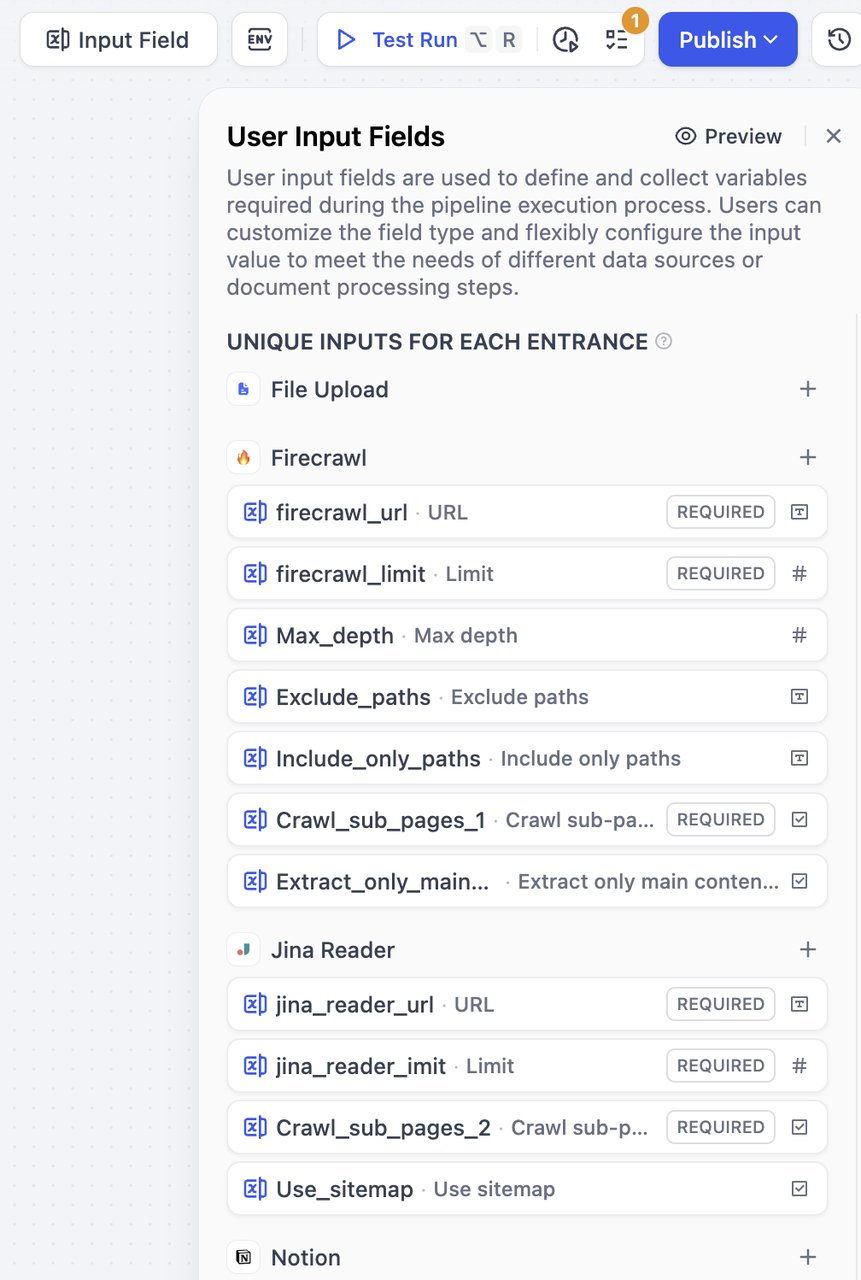
+ button on the right side of a data source to add fields for that specific data source. These fields can only be referenced by that data source and its subsequently connected nodes. 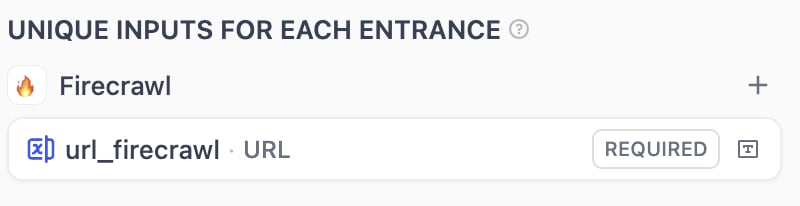
Global Inputs for All Entrances
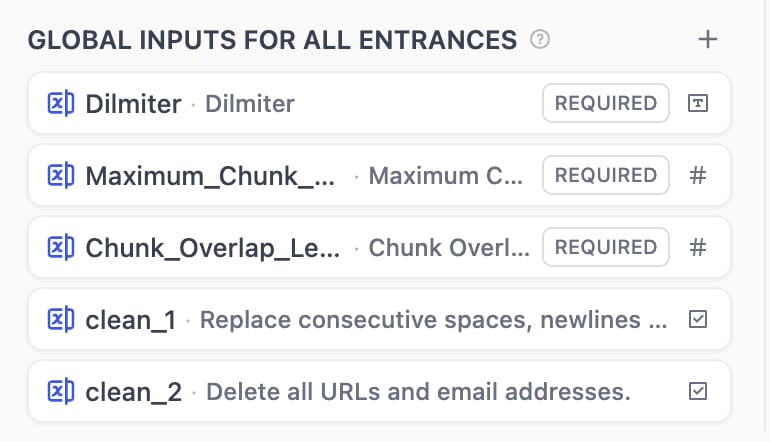
+ button on the right side of Global Inputs to add fields that can be referenced by any node.
Supported Input Field Types
The knowledge pipeline supports seven types of input variables: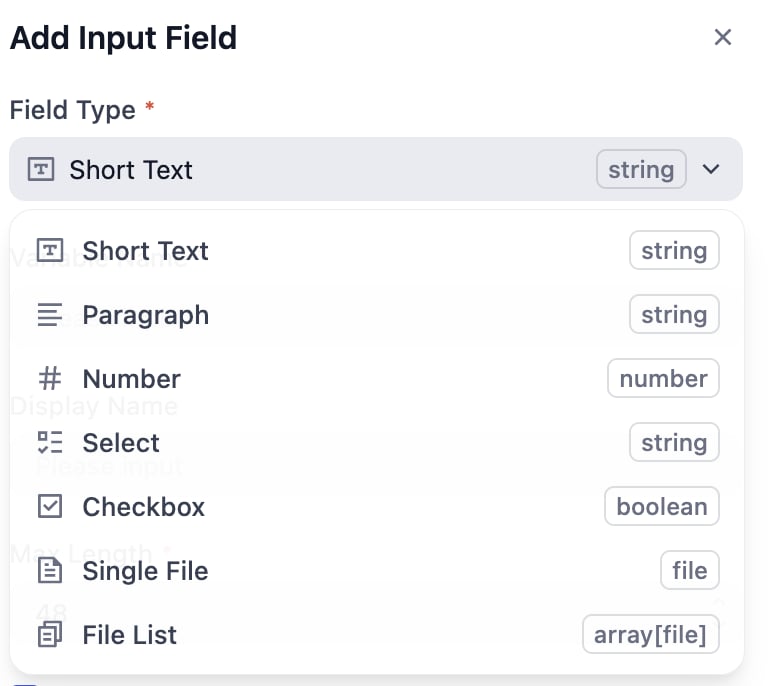
Field Configuration Options
All input field types include: required, optional, and additional settings. You can set whether fields are required by checking the appropriate option.
After completing configuration, click the preview button in the upper right corner to browse the form preview interface. You can drag and adjust field groupings. If an exclamation mark appears, it indicates that the reference is invalid after moving.
Step 5: Name the Knowledge Base
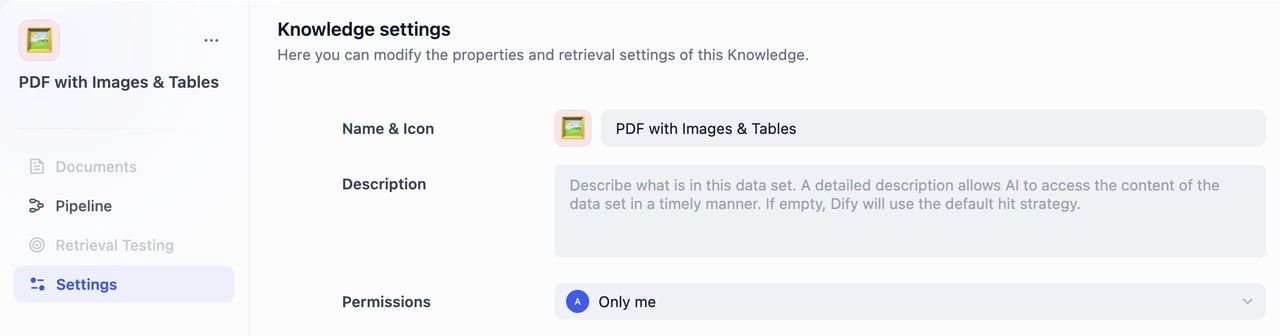
- Name & Icon
Pick a name for your knowledge base.
Choose an emoji, upload an image, or paste an image URL as the icon of this knowledge base. - Knowledge Description
Provide a brief description of your knowledge base. This helps the AI better understand and retrieve your data. If left empty, Dify will apply the default retrieval strategy. - Permissions
Select the appropriate access permissions from the dropdown menu.
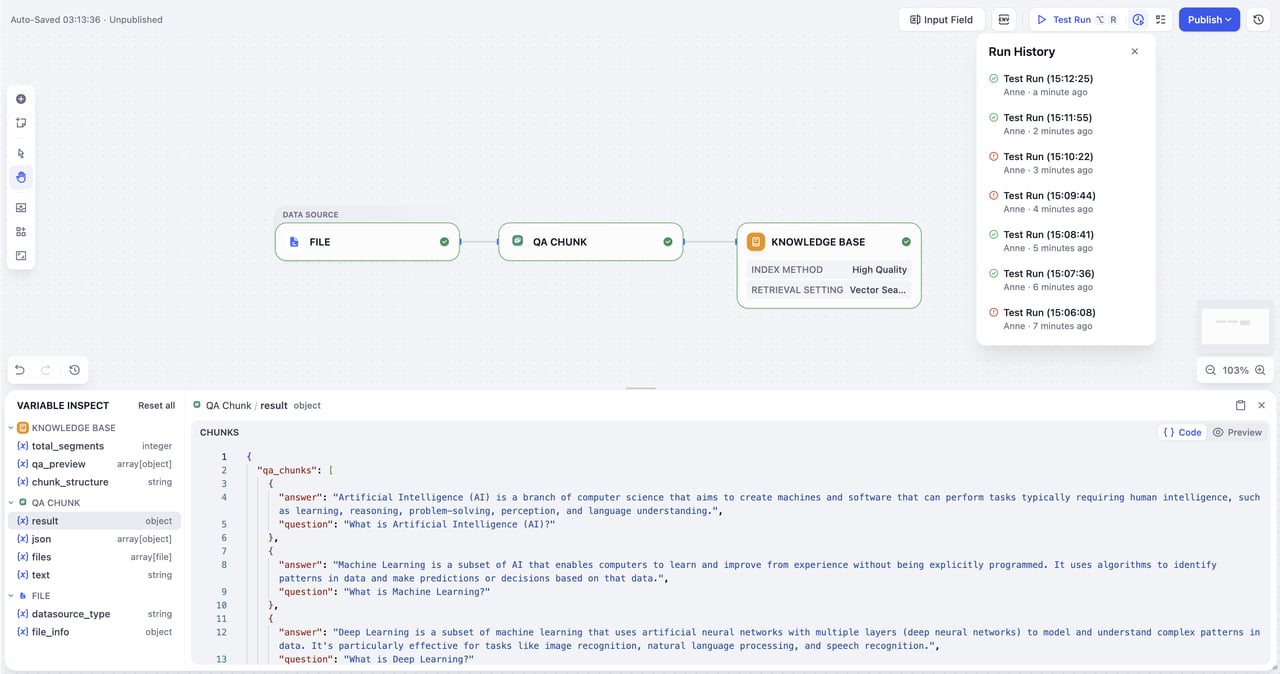
Step 6: Testing
You’re almost there! This is the final step of the knowledge pipeline orchestration. After completing the orchestration, you need to validate all the configuration first. Then, do some running tests and confirm all the settings. Finally, publish the knowledge pipeline.Configuration Completeness Check
Before testing, it’s recommended to check the completeness of your configuration to avoid test failures due to missing configurations. Click the checklist button in the upper right corner, and the system will display any missing parts.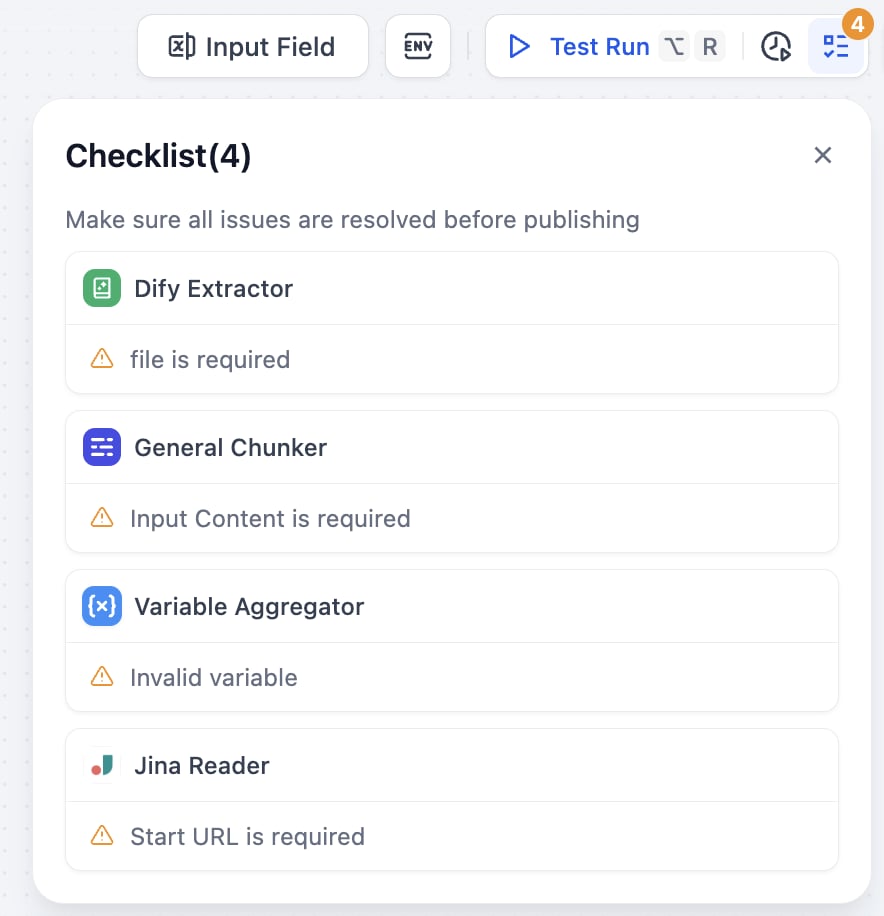
Test Run

- Start Test: Click the “Test Run” button in the upper right corner
- Import Test File: Import files in the data source window that pops up on the right
- Fill Parameters: After successful import, fill in corresponding parameters according to the user input form you configured earlier
- Start Test Run: Click next step to start testing the entire pipeline